The Samsung Galaxy A36 series, consisting of both 4G and 5G variants, offers an impressive mix of features for users who are looking for performance and value in a budget-friendly package. The A36 series stands out with its sleek design, vibrant OLED display, and reliable battery performance. However, just like any other smartphone, over time, components like the OLED screen and battery may need replacement due to wear and tear, damage, or simply a decrease in performance.
In this detailed blog post, we will discuss how to replace the OLED screen, battery, and other essential tools of the Samsung Galaxy A36 (both 4G and 5G versions). We’ll break down everything you need to know, from understanding the importance of these components to performing the replacement process step-by-step.
Understanding the Samsung Galaxy A36: OLED Screen, Battery, and Tools
OLED Screen
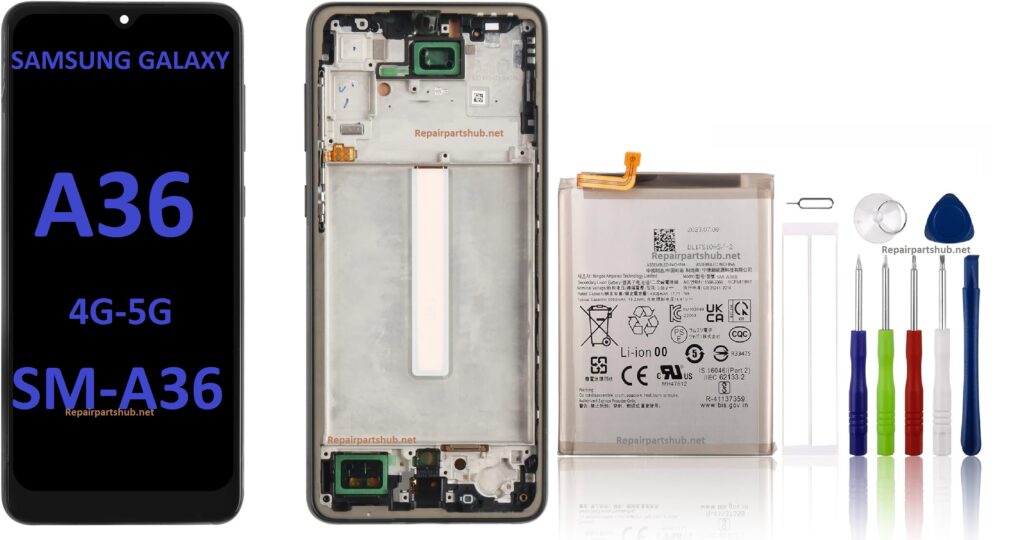
The Samsung Galaxy A36 features an OLED screen, a significant selling point for the device. OLED technology delivers superior contrast, deeper blacks, and more vibrant colors compared to traditional LCD panels. This makes the Galaxy A36 an excellent choice for watching videos, gaming, and general use. However, like any other screen, it is vulnerable to cracks, scratches, or dead pixels over time, especially if the phone is dropped or subjected to physical pressure.
Battery
The battery of the Samsung Galaxy A36 is another critical component, powering the device throughout the day. As with all lithium-ion batteries, the battery life will degrade over time, leading to shorter usage periods between charges. Eventually, the battery may need to be replaced if it can no longer hold a charge efficiently.
Tools for Replacement
To replace the OLED screen, battery, and other internal components, you’ll need some specialized tools. These tools are designed to make the replacement process easier while reducing the risk of damage to the device.
What You Will Need for Replacement
Before jumping into the replacement process, let’s go over the essential tools and equipment you’ll need.
Tools for Screen and Battery Replacement
- Heat Gun or Hairdryer: Used to soften the adhesive holding the screen or battery in place.
- Suction Cup: Helps to lift the screen away from the body without causing damage.
- Plastic Pry Tools: These tools are designed to separate the adhesive without damaging the screen or other components.
- Pentalobe Screwdriver: Required to remove screws around the phone’s edge, usually around the frame.
- Phillips Head Screwdriver: A standard tool for removing screws from the inner components of the phone.
- Tweezers: For handling small components once the screen or battery is removed.
- SIM Card Ejector Tool: If needed, this tool can help remove the SIM card tray.
- Replacement Parts: Of course, you’ll need a new OLED screen or battery, depending on what you’re replacing.
- Adhesive Strips: When installing a new screen or battery, you’ll need adhesive strips to secure the components in place.
- ESD Mat: An Electrostatic Discharge mat to prevent static electricity from damaging your phone’s sensitive parts.
- Opening Picks: For carefully separating the screen from the device.
With these tools in hand, you are ready to begin replacing the OLED screen or battery.
Step-by-Step Guide to Replacing the OLED Screen and Battery
1. Power Off the Device
Always ensure that the phone is completely powered off before starting any repair work. This will avoid any risk of electrical shock or short-circuiting components during the replacement process.
2. Remove the SIM Card Tray
Using the SIM card ejector tool, remove the SIM card tray from the Samsung Galaxy A36. It’s important to remove the tray to avoid damaging it during the process.
3. Loosen the Adhesive Holding the Screen
Using a heat gun or hairdryer, apply gentle heat around the edges of the device. The purpose of the heat is to soften the adhesive securing the screen to the phone’s frame. Be careful not to overheat the device, as this could cause damage to internal components.
4. Use the Suction Cup to Lift the Screen
Attach the suction cup to the screen and pull gently to lift the screen away from the phone. If necessary, you can insert a plastic pry tool around the edges to help separate the screen further. Work slowly and carefully to avoid damaging the internal components.
5. Disconnect the Screen
Once the screen is lifted, you’ll see the connector that links the display to the mainboard. Use your plastic pry tools to disconnect the ribbon cable that connects the OLED display to the phone’s logic board. Be gentle during this step, as ribbon cables can tear easily.
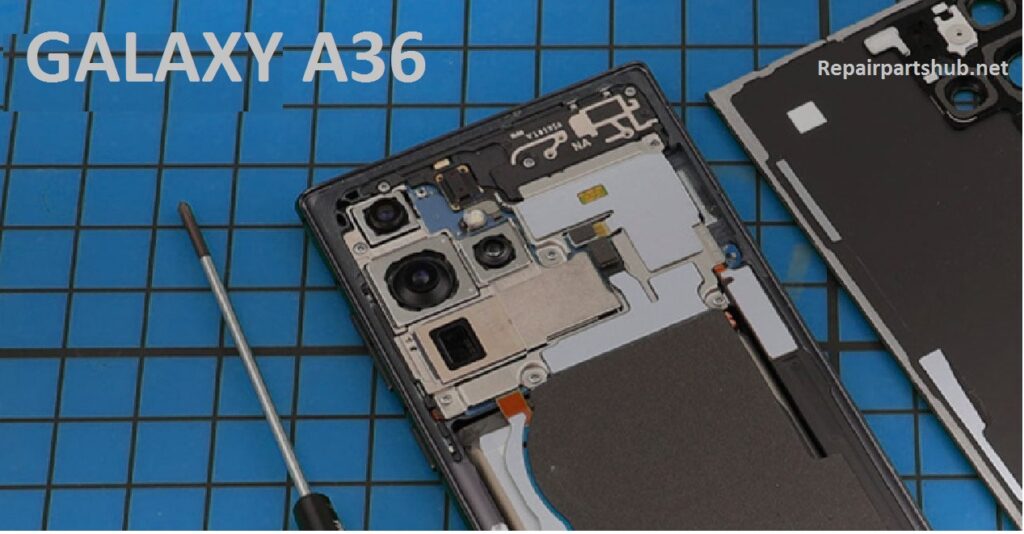
6. Remove the Battery
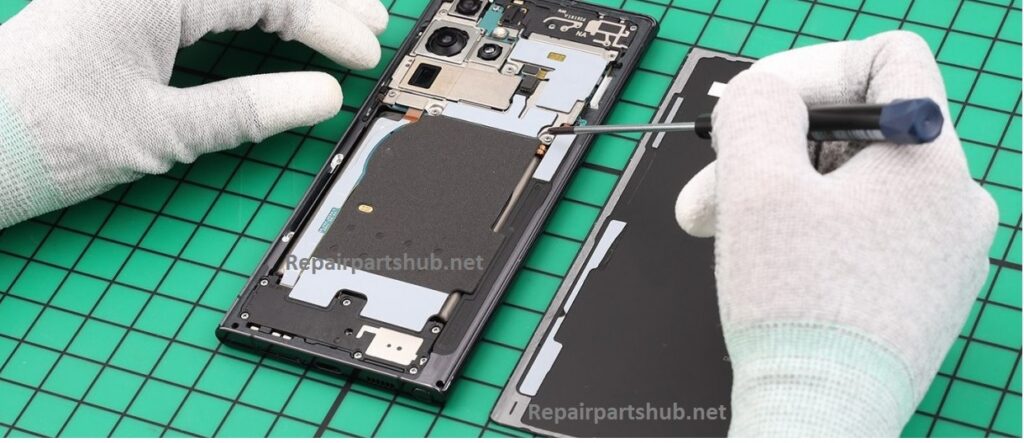
After removing the screen, you may need to remove the battery for replacement. To do this, locate the screws around the battery and remove them carefully using a Phillips head screwdriver. In some cases, the battery may be secured with adhesive, so you’ll need to use a plastic pry tool to lift it off.
If you are replacing the battery, take care to properly dispose of the old one to prevent any environmental hazards.
7. Install the New OLED Screen or Battery
To install the new OLED screen or battery, start by securing the new battery (if applicable) into place with adhesive strips. Make sure the battery is aligned properly with the contacts.
Then, connect the ribbon cable for the new OLED screen. It’s important to ensure that the screen is connected correctly to avoid any display issues.
8. Reassemble the Device
Once the screen and/or battery are properly installed, it’s time to reassemble the phone. Carefully press the new OLED screen back into place, ensuring that it sits flush against the frame.
If needed, use additional adhesive strips to secure the screen to the frame.
9. Reattach the SIM Card Tray
Once the phone is back together, don’t forget to reinsert the SIM card tray.
10. Power On the Device
Power on the Samsung Galaxy A36 to check that everything is functioning correctly. Ensure that the screen is responsive, the battery is charging, and there are no display issues.
11. Test the Replacement
Once the device is powered on, test the new screen and battery. Check for screen responsiveness, color accuracy, and whether the new battery holds a charge.
12. Calibration
Sometimes, after a screen replacement, the phone may need to calibrate the new OLED screen. You can perform this by adjusting the brightness or simply using the phone for a while. If you notice any issues with touch sensitivity, try restarting the device.
Troubleshooting Tips
- Unresponsive Screen: If the new screen is not responding to touch, double-check the ribbon cable connection to ensure it is properly seated.
- Battery Not Charging: If the new battery is not charging, confirm that the battery is properly connected to the motherboard and the connections are clean.
- Display Issues: If you notice flickering or color issues on the new OLED screen, it could be due to a poor-quality replacement screen. Ensure that the replacement part is of high quality to avoid such problems.
Conclusion
Replacing the OLED screen or battery in the Samsung Galaxy A36 is a relatively straightforward process if you have the right tools and some patience. Whether you’re working on the 4G or 5G variant of the device, the steps remain largely the same. By following this comprehensive guide, you can successfully perform the replacement yourself, saving both time and money. However, if you’re unsure or lack the proper tools, consider seeking help from a professional repair technician to avoid damaging your device.
Remember, if you plan to replace the screen or battery, always ensure you are using high-quality, genuine replacement parts. This will help maintain the integrity of your device and ensure long-lasting performance.