The Samsung Galaxy A36, available in both 4G and 5G variants, is a popular mid-range smartphone. While it offers a range of features at an affordable price, like any electronic device, it can eventually face issues with its charging circuit. Whether it’s a faulty charging port, damaged battery connections, or the need to replace the charging IC, understanding the charging circuit and knowing the right tools for replacement can make a huge difference.
Understanding the Charging Circuit in Samsung Galaxy A36
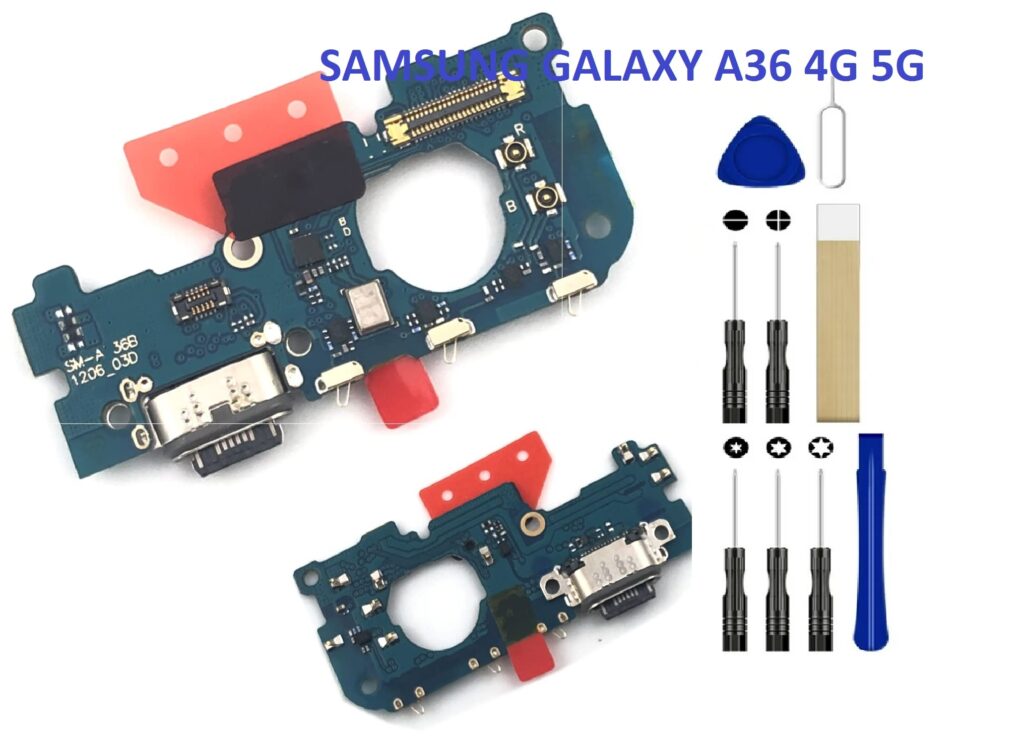
The charging circuit in the Galaxy A36 includes several essential components working together to ensure the phone charges properly. These components include:
- Charging Port: The physical connection point where you plug in the charging cable. Over time, wear and tear or dust accumulation can cause charging issues.
- Charging IC (Integrated Circuit): The charging IC regulates the power that comes into the phone from the charging port and ensures it is distributed correctly to the battery. If the charging IC fails, the phone may not charge at all.
- Battery Connector: This connects the charging circuit to the phone’s battery. Any damage here can prevent the phone from charging or cause power irregularities.
- PCB (Printed Circuit Board): The main board that interconnects all components of the charging circuit, including the charging IC and the battery connector.
Common Issues with Charging Circuits in the Galaxy A36
Some common problems related to the charging circuit are:
- Charging Port Issues: Broken or worn-out USB charging ports, often caused by physical damage or corrosion.
- Faulty Charging IC: If the charging IC is damaged, the phone may fail to recognize a charging source or not charge correctly.
- Loose or Damaged Battery Connection: Poor battery connections can result in charging interruptions or a non-functioning device.
If your Galaxy A36 isn’t charging properly, the first step is to troubleshoot these components to identify the root cause of the problem.
Tools for Replacing the Charging Circuit in the Galaxy A36
If you’ve identified a problem in the charging circuit and need to replace components like the charging port or IC, here’s a list of essential tools that can help make the repair process smoother:
- Screwdriver Set (Precision Tools): A set of small screwdrivers (Phillips and flat-head) is required to remove the screws that hold the back cover and internal components in place.
- Plastic Pry Tools: Plastic prying tools help separate the phone’s back cover or other parts without damaging the surface or internal components.
- SIM Card Ejector Tool: This is essential for removing the SIM card tray, which is usually placed near the charging port.
- Heat Gun or Hair Dryer: Used to soften the adhesive on the back cover of the phone for easier removal.
- Tweezers: For precision handling of small components like screws, connectors, or the charging port.
- Soldering Kit: A soldering iron is necessary for replacing small components like the charging IC, especially if it’s soldered directly onto the PCB.
- Multimeter: A multimeter can be used to check for power continuity in the charging circuit, ensuring that there’s no break or fault.
- PCB Holder: When working with the motherboard, it’s helpful to secure it in place to prevent damage during soldering or other repairs.
- Replacement Parts: Genuine or compatible replacement parts such as the charging port, charging IC, and battery connectors will be needed to fix the issue.
Step-by-Step Guide for Replacing the Charging Circuit

If you’re comfortable with DIY repairs, here’s a general step-by-step guide for replacing the charging circuit components in the Samsung Galaxy A36:
- Power Off the Phone: Always ensure the phone is powered off before beginning any repairs.
- Remove the Back Cover: Use a heat gun to soften the adhesive, then gently pry off the back cover using a plastic tool.
- Disconnect the Battery: Before working on the internal components, disconnect the battery to prevent any short circuits or further damage.
- Inspect the Charging Port: If the charging port is damaged, use a small screwdriver to remove the screws securing it, then disconnect the faulty port from the motherboard.
- Replace the Charging IC (if necessary): If the charging IC is damaged, you will need to use a soldering iron to carefully desolder the old IC and solder a new one in place. Make sure to use the right temperature to avoid damaging the board.
- Reassemble the Phone: After replacing the faulty components, reconnect the battery, ensure everything is properly connected, and carefully reassemble the phone.
- Test the Charging Function: Once the phone is reassembled, plug in the charger and ensure that the device is charging correctly.
Conclusion
Replacing the charging circuit in the Samsung Galaxy A36 4G/5G can be challenging, but with the right tools and careful attention to detail, it’s entirely possible to restore your phone’s charging functionality. Whether you’re dealing with a damaged charging port, faulty charging IC, or a loose battery connector, proper tools like a precision screwdriver set, heat gun, tweezers, soldering kit, and a multimeter will be essential for a successful repair. If you’re not confident in performing the repair yourself, it’s always a good idea to consult a professional technician to avoid further damage.