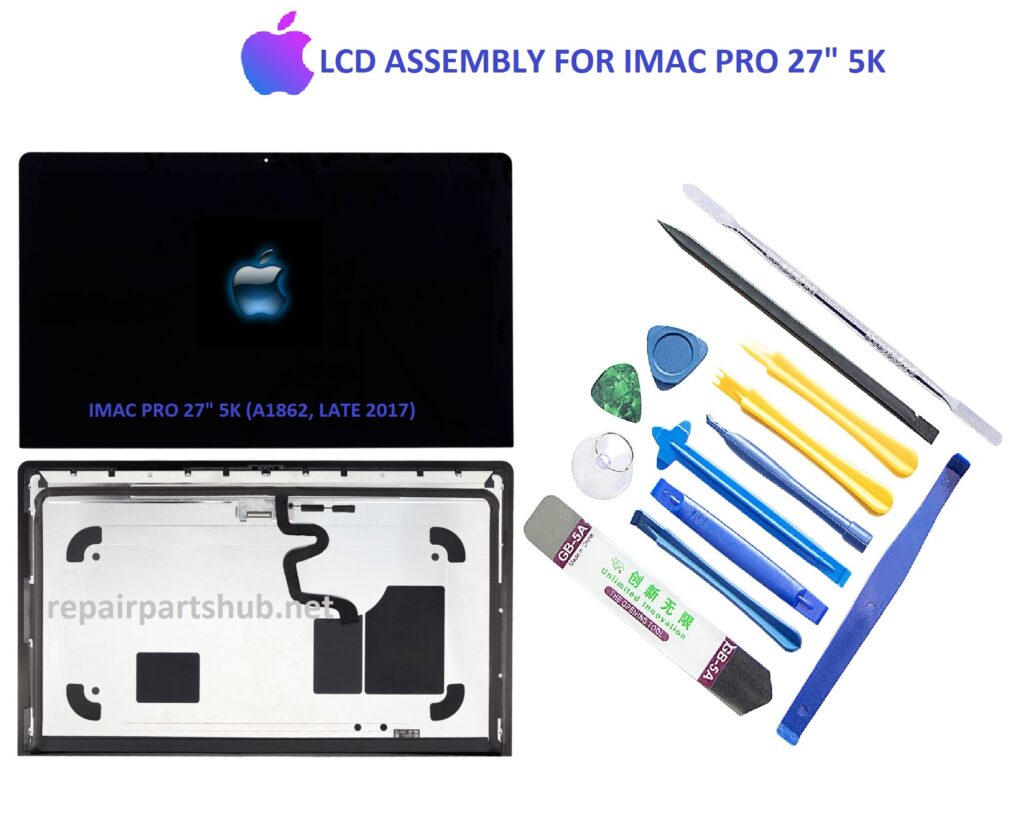
The iMac Pro 27″ 5K (A1862, Late 2017) is a powerhouse of a machine, known for its stunning Retina display, formidable processing power, and sleek all-in-one design. However, like any piece of high-end technology, accidents can happen. A cracked, damaged, or malfunctioning screen can bring down the functionality of an otherwise top-tier device. Whether you’re an IT professional, a DIY enthusiast, or just someone trying to get their iMac Pro back to its full glory, replacing the original screen on the iMac Pro 27″ 5K (A1862, Late 2017) is no small task.
This guide will walk you through the necessary steps, tools, and considerations to successfully replace the screen on your iMac Pro. While this process requires precision and patience, with the right approach, you can restore your iMac Pro to its original, pristine condition.
Tools and Materials You’ll Need:
Before diving into the replacement process, it’s essential to have all the necessary tools and replacement parts at hand. Here’s what you’ll need:
- Replacement 5K Display (Original or Compatible) – Make sure the replacement screen is specifically designed for the iMac Pro 27″ 5K (A1862, Late 2017). Using a screen not designed for this model can result in fitment issues or poor performance.
- Pentalobe P5 and T8 Torx Screwdrivers – These screws hold the display and other components in place. Make sure you have the right size for easy removal.
- Suction Cups or Screen Removal Tools – These will be helpful for removing the screen safely without damaging it. The iMac Pro screen is adhered with strong adhesive.
- Plastic Pry Tools – Useful for separating the screen from the frame without scratching or damaging the internal components.
- Anti-Static Wrist Strap – Prevents electrostatic discharge (ESD) from damaging the sensitive internal parts.
- Opening Picks – These are handy for gently prying the screen apart from the iMac’s frame.
- Adhesive Strips (Optional) – After you install the new screen, you’ll need new adhesive strips to reattach the display to the frame. You can get pre-cut adhesive strips or use an adhesive solution specifically for iMac screens.
Step-by-Step Process for Replacing the iMac Pro 27″ 5K Display:
Step 1: Preparation
- Shut Down and Unplug – Always power down your iMac Pro and unplug it from any power sources. Disconnect all external devices, including the keyboard, mouse, and any USB peripherals.
- Work in a Clean Environment – Set up a clean, static-free workspace. Make sure you have good lighting and plenty of room to safely place the iMac and its components as you work.
- Wear an Anti-Static Wrist Strap – Before touching any internal components, wear an anti-static wrist strap to protect the iMac’s delicate internals from potential static damage.
Step 2: Removing the Front Glass Panel
- Use Suction Cups – Attach suction cups to the edges of the iMac’s front glass. This allows you to lift the glass carefully and prevent damage to the display or the frame.
- Slowly Separate the Glass – The glass is held in place by a strong adhesive. Slowly and carefully lift it off the frame. Use gentle force and make sure not to damage the glass or the LCD panel underneath.
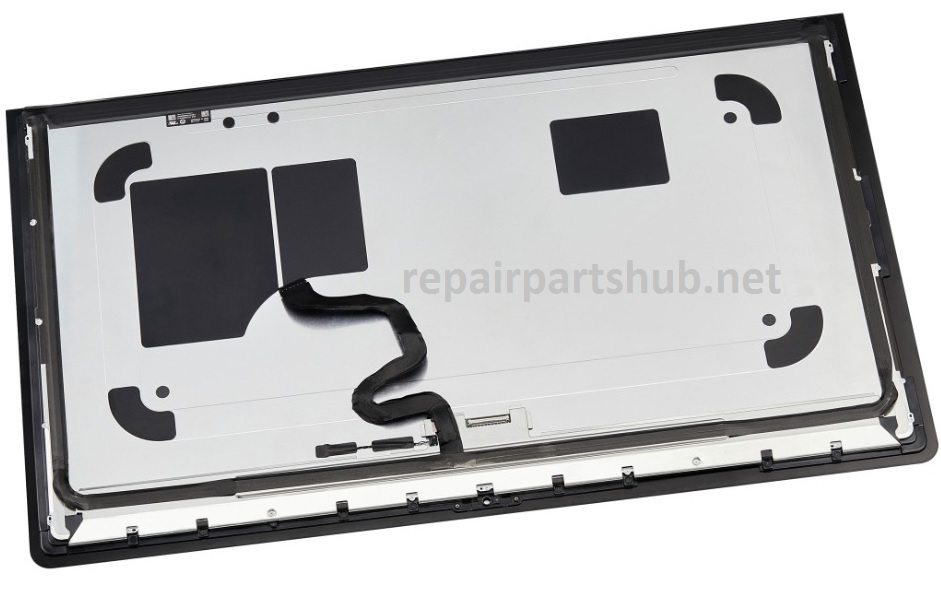
Step 3: Unscrewing the Display
- Remove Screws Around the Display – Once the glass panel is removed, you’ll see the screws that hold the display in place. Use a T8 Torx screwdriver to unscrew these. Keep track of where each screw goes, as some may vary in length.
- Lift the Display – Gently lift the 5K display. If it’s attached with additional adhesive, you may need to use a plastic pry tool to carefully separate the screen from the frame. Work your way around the edges until the display can be removed.
Step 4: Disconnecting the Display
- Unplug the Display Cable – Once the display is loosened, locate the display cable and carefully disconnect it from the logic board. This is usually done by gently lifting the connector latch and removing the cable.
- Careful Removal – Make sure to keep the cable intact, as any damage to the cable could lead to issues with the new screen.
Step 5: Installing the New Display
- Connect the New Display – Take your new replacement display and carefully plug the display cable into the logic board. Ensure it is firmly in place and the connector latch is closed.
- Secure the Display – Position the display back into the frame and secure it with the screws that you removed earlier. Make sure the display is properly aligned with the mounting points.
Step 6: Reattaching the Front Glass Panel
- Apply Adhesive – If you have new adhesive strips, apply them around the edge of the screen where the front glass panel will make contact. If you’re reusing the old adhesive, make sure it is still sticky and effective.
- Position and Attach the Glass – Carefully position the front glass panel back onto the display, ensuring that it is aligned with the frame. Once in place, gently press down to secure the adhesive and ensure a tight seal.
Step 7: Final Testing
- Reconnect Power – Plug your iMac Pro back into a power source and turn it on. Check to ensure the new display is working correctly. Look for any dead pixels, color issues, or brightness inconsistencies.
- Test for Full Functionality – Test the touch of the glass if applicable, and check if everything is functioning correctly, including the brightness, color accuracy, and overall screen performance.
Troubleshooting Tips:
- Screen Flickering or No Display: If the screen isn’t working or is flickering, double-check the cable connection between the display and the logic board. It might not be securely connected.
- Screen Brightness Issues: If the screen appears dim or too bright, check the brightness settings on your iMac. If that doesn’t fix the issue, ensure the display is properly connected to the logic board.
- Cracked Glass but Functional Display: If your iMac Pro screen has a cracked glass but the display itself is functioning fine, you can consider just replacing the glass instead of the whole display. However, this can be a more complicated process and requires precision.
Conclusion:
Replacing the screen on your iMac Pro 27″ 5K (A1862, Late 2017) can be a challenging yet rewarding DIY project. With the right tools, patience, and attention to detail, you can bring your iMac back to life and enjoy the crisp, vibrant display that it was designed for. If you’re not comfortable performing this repair yourself, consider seeking the help of a professional technician to ensure that your iMac Pro stays in top working condition.
By following these steps, you’ll not only extend the life of your iMac Pro, but also gain a deeper understanding of its inner workings. Happy repairing!
If you need any help with specific steps or recommendations for parts, feel free to ask!