If you’re dealing with a cracked screen, unresponsive touch, or display issues on your Nokia X100 5G (model TA-1399), you’re not alone. A damaged screen can be frustrating, but the good news is that it’s completely fixable with the right replacement part and tools. In this guide, we’ll walk you through everything you need to know about the Nokia X100 Screen Replacement using the LCD + Touch Screen Digitizer Assembly for model TA-1399.
Why Replace Your Nokia X100 Screen?
There are several common issues that might require a full screen assembly replacement:
- Cracked or shattered glass
- Unresponsive or malfunctioning touch screen
- Flickering or black display
- Dead pixels or discoloration
- Water damage affecting the display
In many cases, replacing the full display assembly — which includes both the LCD and the digitizer — is more efficient and reliable than attempting to repair components separately.
What You’ll Need
To replace the screen on your Nokia X100, you’ll need:
Replacement Part:
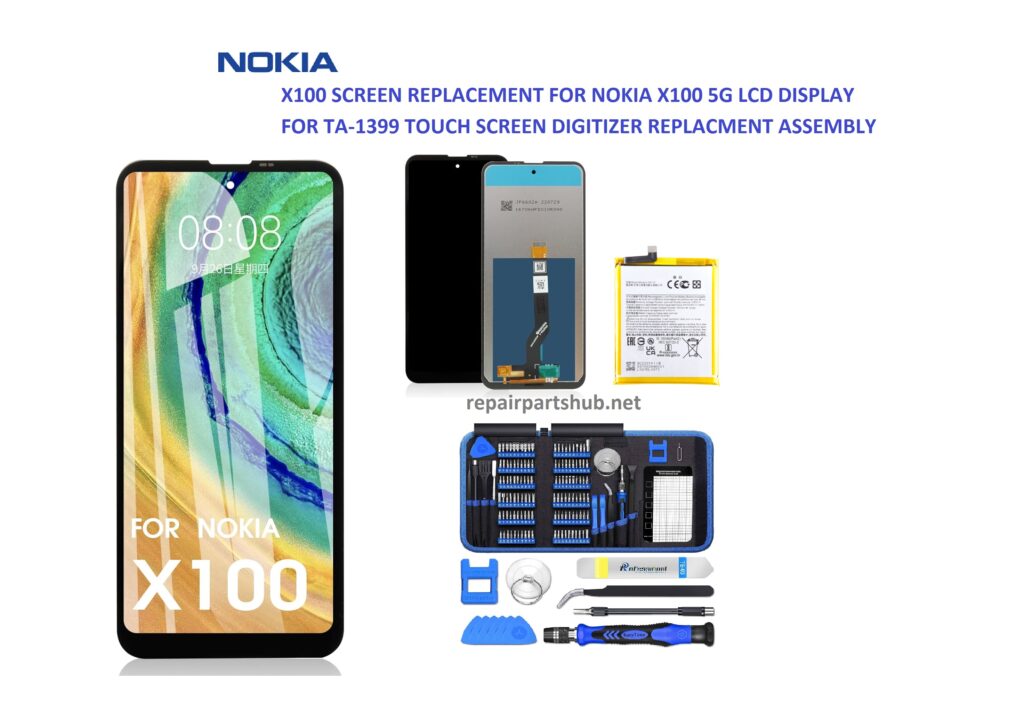
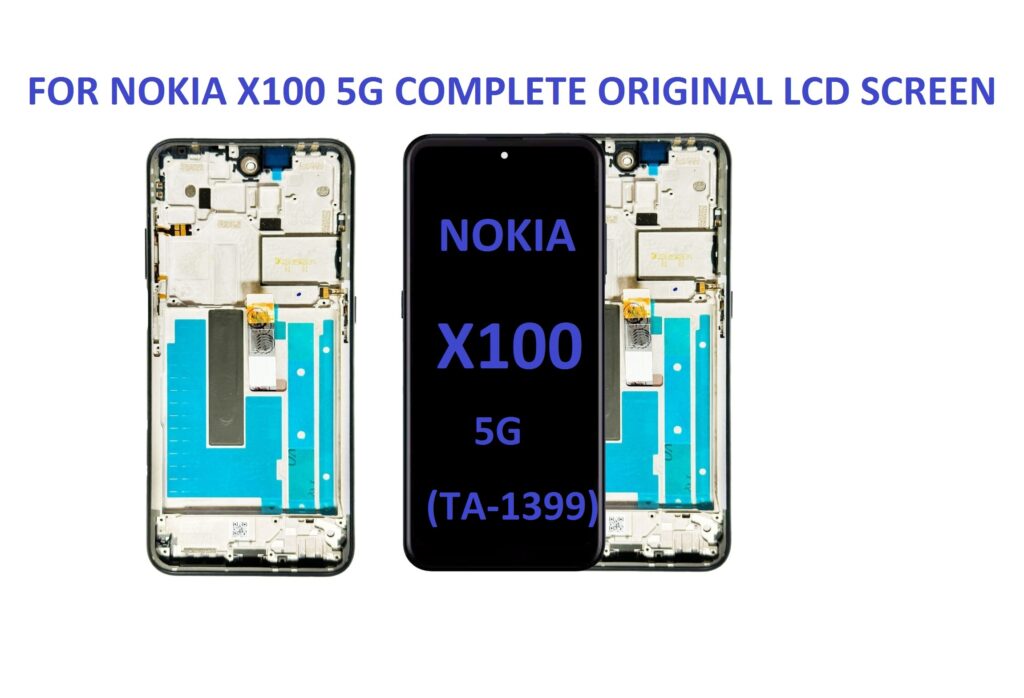
- Nokia X100 5G LCD Display + Touch Screen Digitizer Replacement Assembly (TA-1399)
Ensure it is compatible with the TA-1399 model. These come pre-bonded for easier installation.
Tools:
- Precision screwdriver set
- Plastic opening tools
- Suction cup
- Tweezers
- SIM tray ejector
- Heat gun or hairdryer
- Adhesive tape or glue (if the replacement does not include adhesive)
Step-by-Step Replacement Guide
Disclaimer: Screen replacements should be done with care. If you’re unsure, consult a professional. This process may void your warranty.
Step 1: Power Off and Remove SIM Tray
Turn off your Nokia X100 and remove the SIM card tray using an ejector tool.
Step 2: Remove the Back Cover
Using a heat gun or hairdryer, apply gentle heat around the edges to loosen the adhesive. Insert a plastic prying tool between the back cover and the frame. Gently work your way around to release the clips and adhesive.
Step 3: Disconnect the Battery
Carefully unscrew and remove the metal shield covering the connectors. Use a plastic tool to disconnect the battery connector first to prevent any electrical damage.
Step 4: Remove the Old Screen
- Disconnect the screen’s flex cable.
- Apply heat around the screen’s edge to soften the adhesive.
- Use a suction cup and a prying tool to lift the screen slowly from the frame.
- Be careful around the corners to avoid damaging internal components.
Step 5: Install the New Screen
- Clean any residue left from the old adhesive.
- Connect the new LCD and digitizer flex cable to the motherboard to test the screen before sealing it in.
- If everything works, apply new adhesive around the frame and press the new screen into place.
- Reconnect the battery and reassemble the phone.
Step 6: Final Testing
Turn the device on and test:
- Touch sensitivity
- Display clarity and brightness
- Camera and proximity sensor functionality
Once confirmed, you’re all set!
Where to Buy a Quality Nokia X100 Screen Assembly
When buying a replacement screen, always go for reputable suppliers or OEM-grade parts. You can find these on trusted platforms like:
- Amazon
- repairpartshub
Specialized mobile parts suppliers
Look for sellers that provide:
- Compatibility with TA-1399
- Pre-tested screens
- Warranty or return policy
Final Thoughts
Replacing the screen on your Nokia X100 5G doesn’t have to be a hassle. With a compatible LCD + Digitizer Replacement Assembly and a bit of patience, you can restore your device to like-new condition. This repair can save you money and extend the life of your phone, keeping you connected without breaking the bank.
Need Help or Have Questions?
Drop them in the comments below, or consult a repair technician if you’re unsure about the steps.
Would you like a downloadable PDF version of this guide?