In recent years, smartphones have become an indispensable part of our daily lives. However, due to the constant usage, accidental drops, or mishaps, smartphone screens can become damaged. The ITEL A58 Lite (A631W) and A04 (A632W) models are no exception, and it is common for users to encounter issues such as cracked or shattered LCD screens. If you’ve found yourself in a situation where the LCD on your ITEL A58 Lite or A04 is broken, this comprehensive guide will walk you through the process of replacing the LCD screen, as well as the necessary tools required for the task.
Why Replace the LCD Screen?
Replacing the LCD screen on your ITEL A58 Lite (A631W) or A04 (A632W) is essential for several reasons:
- Display Issues: If your screen shows dead pixels, strange lines, discoloration, or flickers, it might be time for a replacement.
- Cracks or Shattering: A cracked or shattered screen can affect both the functionality and aesthetics of your phone. A replacement is necessary for a fully functional display.
- Touchscreen Malfunctions: If the touchscreen becomes unresponsive or erratic, it could indicate internal damage that requires a new LCD.
Replacing the LCD screen will restore your device’s performance and appearance. However, before proceeding, it’s crucial to understand the tools you’ll need to perform the replacement effectively and efficiently.
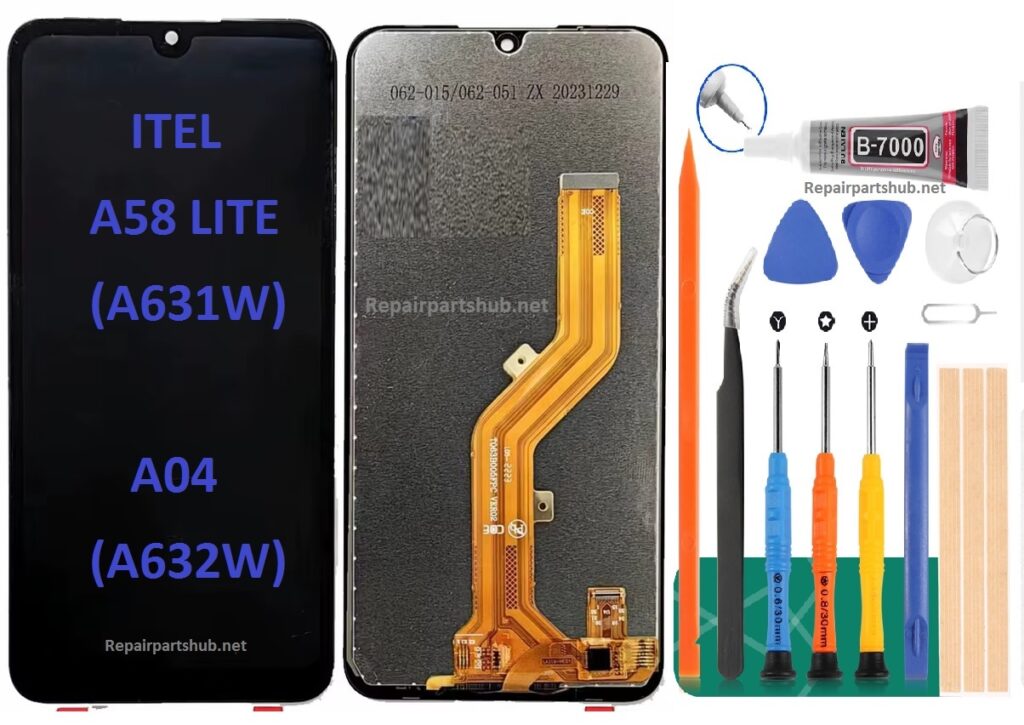
Tools Required for ITEL A58 Lite (A631W) / A04 (A632W) LCD Replacement
To successfully replace the LCD on your ITEL A58 Lite (A631W) or A04 (A632W), you will need to have a set of essential tools. Make sure you have the following items:
- Screwdrivers:
- Phillips Head Screwdriver: For removing the screws securing the back cover and internal components.
- Pentalobe Screwdriver (if applicable): Some devices have pentalobe screws, especially around the screen or battery area.
- Plastic Pry Tools:
- These tools are essential for separating the display from the phone without damaging the internal parts. Avoid using metal tools, as they can scratch or break delicate components.
- Suction Cup Tool:
- This tool is used to lift the display gently from the frame. The suction cup is especially helpful for separating the screen from the adhesive used in modern smartphones.
- Heat Gun or Hair Dryer:
- Heat is necessary to soften the adhesive holding the LCD in place. This helps reduce the risk of damaging the screen during removal.
- Tweezers:
- A fine pair of tweezers is essential for handling small parts like screws, connectors, and the new LCD.
- SIM Card Tray Ejector Tool:
- Some models require you to remove the SIM card tray before opening the phone. A SIM card tray ejector tool will be useful for this.
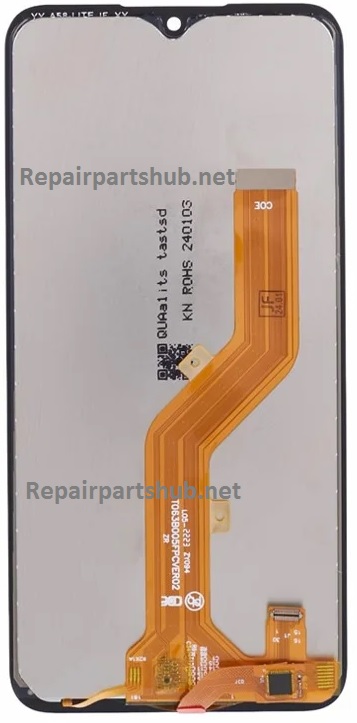
- Replacement LCD Screen:
- Ensure that you purchase the correct LCD replacement for your ITEL A58 Lite (A631W) or A04 (A632W). Make sure the screen is OEM (Original Equipment Manufacturer) or high-quality compatible.
- Adhesive Strips:
- If you’re replacing the screen, you’ll need adhesive strips to secure the new display in place. Some kits come with pre-applied adhesive.
- Anti-static Wrist Strap:
- This helps prevent static electricity from damaging the internal components of your phone while working on it.
Steps to Replace the LCD Screen on ITEL A58 Lite (A631W) / A04 (A632W)
Once you have gathered all the necessary tools and your replacement LCD screen, you can proceed with the replacement process. Here’s a step-by-step guide to replacing the LCD:
Step 1: Power Off Your Device
- Begin by turning off the phone to avoid any potential short circuits or damage to the internal components during the repair.
Step 2: Remove the SIM Card Tray
- Using the SIM card tray ejector tool, carefully remove the SIM card tray from the phone to avoid damaging it during the disassembly process.
Step 3: Heat the Device (Optional but Recommended)
- Use a heat gun or hair dryer to warm the edges of the phone. This will help soften the adhesive holding the screen in place. Be sure to avoid overheating the device, as this can cause damage to the internal components.
Step 4: Remove Screws
- Using a Phillips head screwdriver, remove all screws on the back of the phone. These screws are usually located along the edges and near the corners of the device.
- If there are pentalobe screws, use the appropriate screwdriver to remove them.
Step 5: Pry Open the Back Cover
- With a plastic pry tool, gently separate the back cover of the phone. Take your time to work the tool along the edges to ensure that you don’t damage any clips or components.
Step 6: Disconnect the Battery
- Once the back cover is removed, locate and disconnect the battery connector. This will prevent any power from running through the device while you work on it.
Step 7: Detach the Old LCD Screen
- Use the suction cup tool to carefully lift the screen from the frame. Start from one corner and gently work your way around the screen.
- If necessary, use a plastic pry tool to separate the display further, ensuring you do not break the fragile parts.
- Disconnect the LCD’s ribbon cable from the motherboard by using tweezers to gently lift the connector.
Step 8: Install the New LCD Screen
- Carefully connect the ribbon cable of the new LCD screen to the motherboard. Ensure that the connection is secure.
- Place the new LCD screen into the frame of the phone, making sure it fits snugly and lines up correctly with the edges.
Step 9: Reassemble the Device
- Once the new screen is in place, secure it using adhesive strips if necessary.
- Reconnect the battery connector, then reassemble the phone by following the reverse order of disassembly (install the back cover and secure all screws).
Step 10: Test the New Screen
- Power on the device and test the new LCD screen for functionality. Make sure the touchscreen is responsive, and check for any display issues such as dead pixels or discoloration.
Conclusion
Replacing the LCD screen on your ITEL A58 Lite (A631W) or A04 (A632W) might seem like a daunting task, but with the right tools and a steady hand, it can be done efficiently. The most important steps are to ensure you have the correct replacement screen and to handle the internal components carefully.
If you’re not comfortable with performing the replacement yourself, it’s always advisable to seek help from a professional technician or repair service to avoid potential damage to your phone.
By replacing the damaged LCD screen, your ITEL device will look and function as good as new, providing you with a seamless smartphone experience once again. Happy repairing!