The ITEL A57 (A611WP) is a smartphone that has gained popularity for its affordable price, reliable performance, and sturdy build. However, like any other mobile device, it’s not immune to accidents that might lead to a damaged or cracked LCD screen. If you’re an ITEL A57 owner and have found yourself in need of a screen replacement, this blog post will guide you through the process, provide an overview of the tools required, and help you make an informed decision about repairing or replacing the screen yourself.
Understanding the ITEL A57 (A611WP) LCD Screen
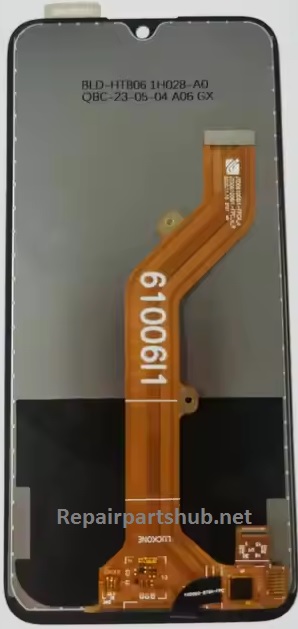
The ITEL A57 features a 6.6-inch display with an HD+ resolution, which ensures vibrant visuals and a smooth user experience for its price range. However, the LCD screen can be prone to damage from drops, impacts, or prolonged pressure. Cracks, dead pixels, or a complete lack of display functionality are common issues that arise when the screen is damaged.
When dealing with any smartphone screen replacement, it’s important to understand that the screen typically consists of multiple layers: the LCD panel, the touch digitizer, and the glass layer. All these components work in tandem to provide a responsive and clear display. Replacing just the cracked glass layer may not fix issues like dead pixels or unresponsiveness, so it’s essential to replace the entire screen assembly if necessary.
Common Issues with the ITEL A57 LCD Screen
- Cracked Glass: This is the most common issue faced by users. Accidental drops, impacts, or pressure may lead to a cracked screen, causing visual discomfort or making the phone unusable.
- Unresponsive Touchscreen: Sometimes, the touchscreen may stop working altogether or become erratic, which might indicate issues with the digitizer or LCD.
- Display Flickering or Color Distortion: A malfunctioning LCD panel can lead to flickering or distorted colors, making it difficult to use the phone.
- Black Screen: In some instances, the display may go completely black due to internal damage, such as a malfunctioning connector or circuit failure.
Replacing the ITEL A57 LCD Screen: A Step-by-Step Guide
Replacing the ITEL A57 LCD screen can be a tricky process, especially if you don’t have prior experience with phone repairs. However, with the right tools, patience, and attention to detail, you can perform the replacement yourself and save on repair costs.
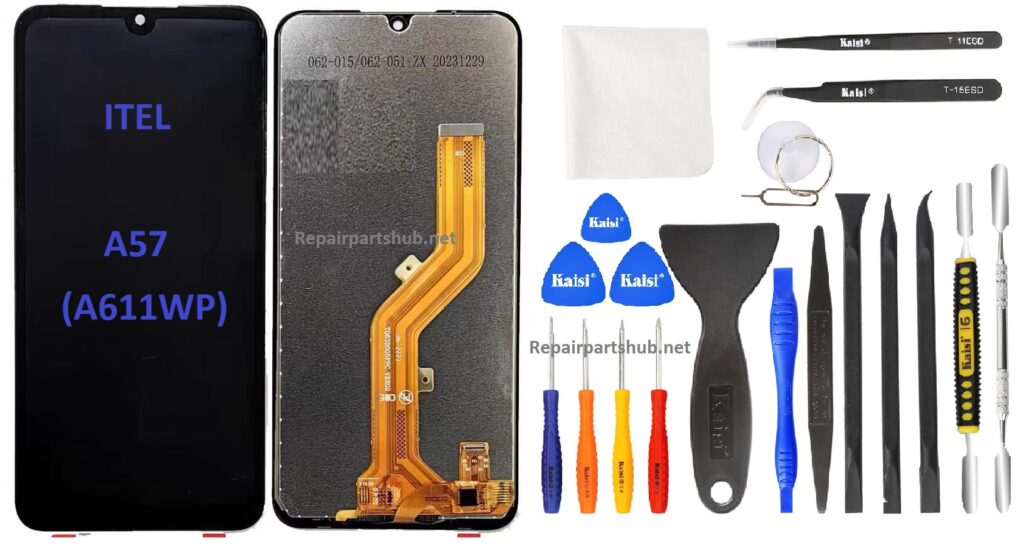
Step 1: Gather the Necessary Tools
Before you begin the replacement process, make sure you have all the tools and equipment you need. Having the right tools is crucial for ensuring a smooth repair process and preventing further damage to your phone.
Tools You’ll Need:
- Plastic Pry Tools: These are used to separate the screen from the body of the phone without damaging internal components or scratching the casing.
- Small Phillips Head Screwdriver: Used to remove screws that hold the phone together.
- Suction Cup: Helps in lifting the screen from the phone without putting too much pressure on the glass.
- Heat Gun or Hairdryer: A heat gun helps soften the adhesive used to hold the screen to the phone body. A hairdryer can also work, but a heat gun gives you more control.
- SIM Card Ejector Tool: This tool is needed to eject the SIM tray, as it may be in the way of removing the back cover.
- Tweezers: Useful for handling delicate components once the phone is opened.
- Replacement Screen Assembly (LCD + Digitizer + Glass): This is the most important part of the repair. Make sure you purchase an authentic replacement screen compatible with the ITEL A57 (A611WP).
- Adhesive: You will need a fresh adhesive to reattach the new screen to the phone after the replacement.
- Anti-Static Wrist Strap: Protects your phone’s internal components from static discharge, which can potentially damage sensitive parts.
Step 2: Prepare the Workspace
Ensure your workspace is clean, dry, and well-lit. You should have a flat surface to work on, such as a table or desk. It’s also recommended to use a phone repair mat to organize and keep track of screws and small parts.
Step 3: Power Off the Device
Before you begin disassembling the phone, ensure it’s powered off completely to avoid short-circuiting any components or causing further damage.
Step 4: Remove the SIM Card Tray
Use the SIM card ejector tool to remove the SIM tray. This will provide unobstructed access to the phone’s body.
Step 5: Heat the Edges of the Screen
Use a heat gun or hairdryer to soften the adhesive holding the screen in place. Hold the heat gun about 6 inches from the edge of the screen and apply gentle heat for about 1-2 minutes. This makes it easier to separate the screen from the phone body.
Step 6: Pry Open the Screen
Attach a suction cup to the screen to lift it slightly. Once there’s enough space, use a plastic pry tool to gently separate the screen from the phone body. Start at one corner and work your way around the edges, being cautious not to damage the internal components.
Step 7: Disconnect the Battery and Other Internal Components
Once the screen is separated, locate and disconnect the battery and any cables attached to the motherboard. This step is crucial to avoid any electrical damage during the repair.
Step 8: Remove the Old LCD Screen
Now that the phone is open, carefully remove the screws holding the LCD in place. Disconnect the flex cables that attach the LCD panel to the motherboard. Gently remove the damaged LCD screen from the phone frame.
Step 9: Install the New LCD Screen
Position the new LCD screen carefully and reconnect all the flex cables and connectors. Secure the new screen in place by tightening the screws.
Step 10: Reassemble the Phone
Once the new screen is securely in place, reconnect the battery, and make sure everything is in order. Carefully align the phone frame and press the screen against the body. Apply fresh adhesive around the edges of the screen, and use the suction cup to firmly press it into place.
Step 11: Power On and Test
Before sealing the phone, power it on and check if the screen is functioning properly. Test for touch responsiveness, color accuracy, and other key functions. If everything looks good, you can proceed to close the phone.
Step 12: Seal the Phone and Finish
Finally, reassemble the phone by replacing the back cover and securing it with screws. Insert the SIM card tray back into place and power on the device.
Alternative: Professional Repair Services
While performing the screen replacement yourself can save money, it’s not for everyone. If you lack the experience or are unsure about handling delicate components, it might be best to seek professional repair services. Many phone repair shops or authorized service centers can handle the replacement for you, though it may come at a higher cost.
Conclusion
Replacing the ITEL A57 LCD screen can be a challenging but rewarding process. With the right tools, patience, and attention to detail, you can restore your phone to its former glory and avoid the expense of a professional repair. If you’re uncomfortable performing the replacement yourself, remember that professional services are always an option. Whether you opt for DIY repairs or professional help, it’s important to ensure that the replacement parts are of high quality to guarantee optimal performance.
By understanding the tools and steps required for the replacement process, you’ll be better equipped to make the best decision for your ITEL A57.