Introduction
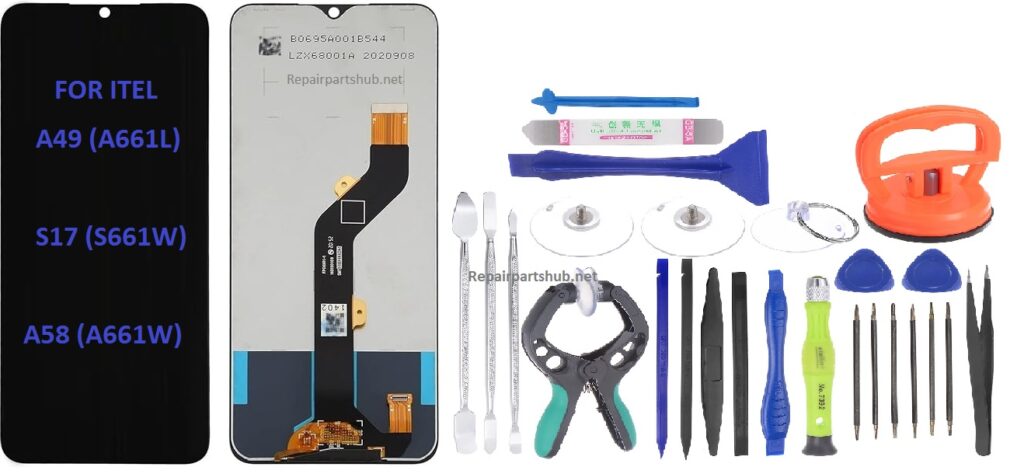
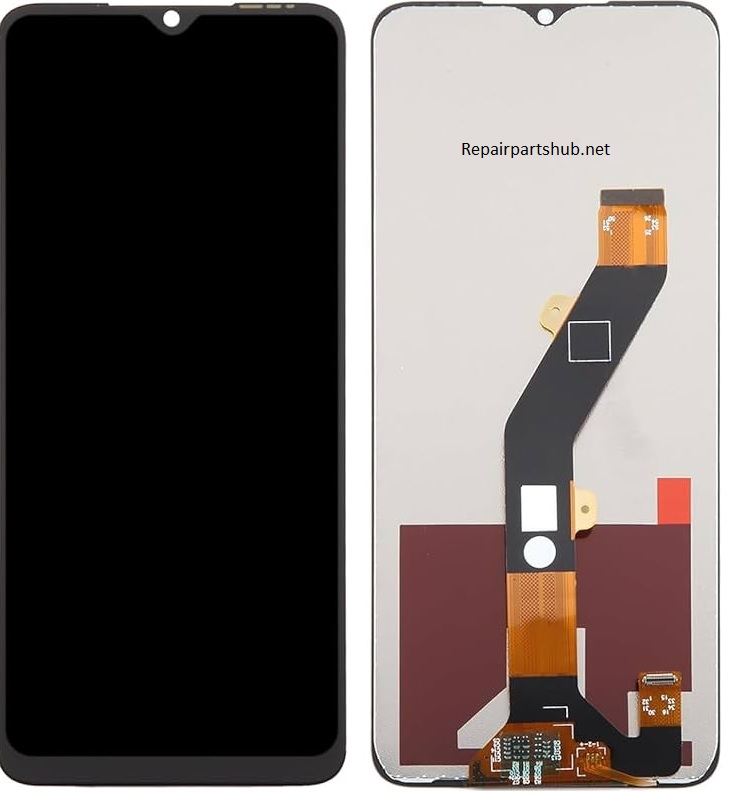
If you’ve ever experienced a cracked or malfunctioning screen on your Itel A49 (A661L), S17 (S661W), or A58 (A661W), you know how frustrating it can be to use a device with a broken LCD. Whether the screen is cracked, unresponsive, or showing distorted images, replacing the LCD is the solution to restoring your phone to full functionality.
In this guide, we’ll walk you through the process of replacing the LCD for these three Itel models (A49, S17, and A58) and the necessary tools you’ll need to complete the repair successfully.
Overview of the Itel A49, S17, and A58
Before diving into the replacement process, it’s important to know a little bit about these models.
- Itel A49 (A661L): The Itel A49 is a budget-friendly smartphone featuring a 6.6-inch display, making it an attractive choice for users looking for a large screen at an affordable price. The phone comes with a modest set of specs, but it’s known for its value and reliability in the budget segment.
- Itel S17 (S661W): The Itel S17 is another budget smartphone with a 6.6-inch display, designed to meet the needs of everyday users. Its sleek design and large screen make it popular in emerging markets. The phone features decent performance for its price but can face screen issues due to everyday wear and tear.
- Itel A58 (A661W): The Itel A58 comes with a 6.6-inch HD+ display, catering to users who prioritize a large screen experience without breaking the bank. It packs basic specs but offers a reliable user experience for general tasks.
Why Replace the LCD?
The most common reasons for replacing the LCD on any of these models include:
- Cracked screen: Dropping the phone can lead to cracks or breaks on the LCD, making it difficult to use the device.
- Unresponsive touch: If the touch screen stops responding, it could be an issue with the LCD or digitizer.
- Distorted images or black screen: A malfunctioning LCD may display incorrect colors, flickering, or a completely black screen.
- Display burn-in: Sometimes, parts of the screen can retain images, which are caused by prolonged display of static content.
Tools Required for LCD Replacement
Replacing the LCD on an Itel A49, S17, or A58 requires a few essential tools to ensure the process is done safely and efficiently. Here’s a list of the tools you’ll need:
- Small Phillips Head Screwdriver: You’ll need this to unscrew the screws that hold the back cover and internal components of the phone.
- Plastic Pry Tools: These are used to safely detach the back cover, battery, and any internal components without damaging the delicate parts.
- Suction Cup Tool: This tool helps lift the screen from the frame without putting pressure on the glass.
- Tweezers: To handle small screws and delicate components.
- SIM Card Ejector: To remove the SIM tray before disassembling the phone.
- Heat Gun or Hair Dryer: To soften the adhesive and make it easier to remove the old LCD screen.
- Adhesive or Double-Sided Tape: To secure the new LCD to the phone frame once the replacement is completed.
- LCD Replacement Screen: Of course, the replacement LCD screen for your specific model is necessary to complete the process.
Step-by-Step Guide for LCD Replacement
Step 1: Prepare Your Workspace
Before you begin, make sure you’re working in a clean, well-lit area. It’s also a good idea to wear an anti-static wristband to prevent any static electricity from damaging the internal components of the phone.
Step 2: Power Off the Device
Always ensure that your device is powered off completely before you start the replacement process to avoid any accidental shorts or damage to the internal components.
Step 3: Remove the SIM Tray
Use the SIM card ejector tool to remove the SIM tray from the phone. This ensures that no components get damaged during disassembly.
Step 4: Unscrew the Back Cover
Use the small Phillips head screwdriver to remove the screws securing the back cover of the phone. Carefully remove the back cover with the help of plastic pry tools.
Step 5: Remove the Battery
In some cases, you may need to remove the battery before continuing with the replacement. Carefully disconnect any battery connectors to prevent any electrical shorts during the procedure.
Step 6: Heat the Device (Optional)
To loosen the adhesive holding the LCD in place, you may want to use a heat gun or hairdryer on a low setting for about 2-3 minutes. This makes the adhesive softer and easier to remove.
Step 7: Detach the LCD Screen
Use the suction cup tool to gently lift the LCD screen from the body of the phone. Start from the edge and work your way around the screen. Be careful not to use too much force to avoid damaging the frame or the new screen.
Step 8: Remove the Old LCD
Once the LCD is lifted, carefully detach it from the internal connections by removing any screws or clips holding it in place. You may need to use tweezers to disconnect any ribbon cables or connectors.
Step 9: Install the New LCD
Position the new LCD in place and connect any internal connectors or ribbon cables. Make sure that everything is aligned properly before securing it into place.
Step 10: Reassemble the Device
Once the new LCD is installed, reassemble the phone by reconnecting the battery, screwing the back cover in place, and reinserting the SIM tray.
Step 11: Test the Device
Before you finalize the repair, power on the phone to ensure that the new LCD is functioning correctly. Test the touch functionality, display clarity, and color accuracy to make sure everything is working as expected.
Common Troubleshooting Tips
- Unresponsive screen after replacement: If the new LCD isn’t responding to touch, check the connections and make sure the digitizer cable is properly connected.
- Screen flickering: Flickering could indicate a loose connection, so check the ribbon cable and ensure it’s securely attached.
- Backlight issues: If the backlight is too dim or flickering, it could be due to improper installation or a faulty replacement part.
Where to Buy LCD Replacement Screens
When purchasing a replacement LCD, make sure you buy from a trusted seller or service center. You can find replacement LCDs from popular online stores like Amazon, eBay, or specific Itel service centers. Ensure the LCD you purchase is compatible with your device model (A49, S17, A58).
Conclusion
Replacing the LCD on your Itel A49 (A661L), S17 (S661W), or A58 (A661W) is a straightforward process if you have the right tools and patience. Whether you’re repairing a cracked screen or fixing an unresponsive display, following the steps above will help you restore your phone to its full working condition.
Remember, the tools and parts you use are crucial to the success of your repair. Always make sure you have high-quality replacement parts and proceed with caution to avoid any damage to the phone’s components. With this guide, you should be well-equipped to replace your Itel phone’s LCD and get it back in action.