Samsung Galaxy Note 9 N960U N960F Charging Flex Replacement Guide: Tools, Steps, and Tips
The Samsung Galaxy Note 9 is one of the most iconic smartphones ever released, featuring top-notch specs, an elegant design, and remarkable performance. However, even the most premium devices experience wear and tear over time. One of the most common issues that users face with the Galaxy Note 9 (N960U, N960F variants) is a malfunctioning or damaged charging flex cable. This problem can lead to charging issues, such as slow charging, no charging, or connectivity problems when plugging in the charger.
If you’re facing charging-related issues with your Galaxy Note 9, a faulty charging flex cable could be the culprit. Fortunately, replacing this part is possible with the right tools and a little patience. In this comprehensive guide, we’ll walk you through everything you need to know about replacing the charging flex in your Samsung Galaxy Note 9 N960U/N960F. We will discuss the tools required, provide step-by-step instructions, and offer helpful tips to ensure a successful repair.
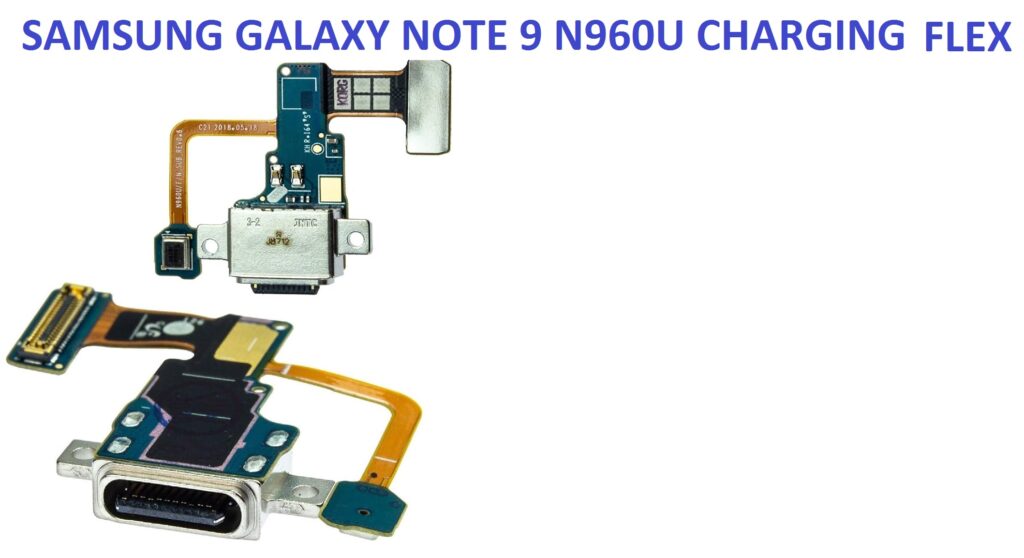
What Is the Charging Flex Cable?
The charging flex cable in your Samsung Galaxy Note 9 is responsible for connecting the charging port (USB-C) to the phone’s motherboard. This part also supports functions such as data transfer, charging, and headphone jack functionality (in the case of certain variants). When the charging flex cable is damaged, it can lead to charging problems, such as the device not charging, slow charging, or intermittent charging.
Some potential causes of damage to the charging flex cable include:
- Physical wear and tear from regular use
- Accidental drops or impacts
- Moisture exposure or liquid damage
- Overheating of the device
- A faulty connector on the charging port
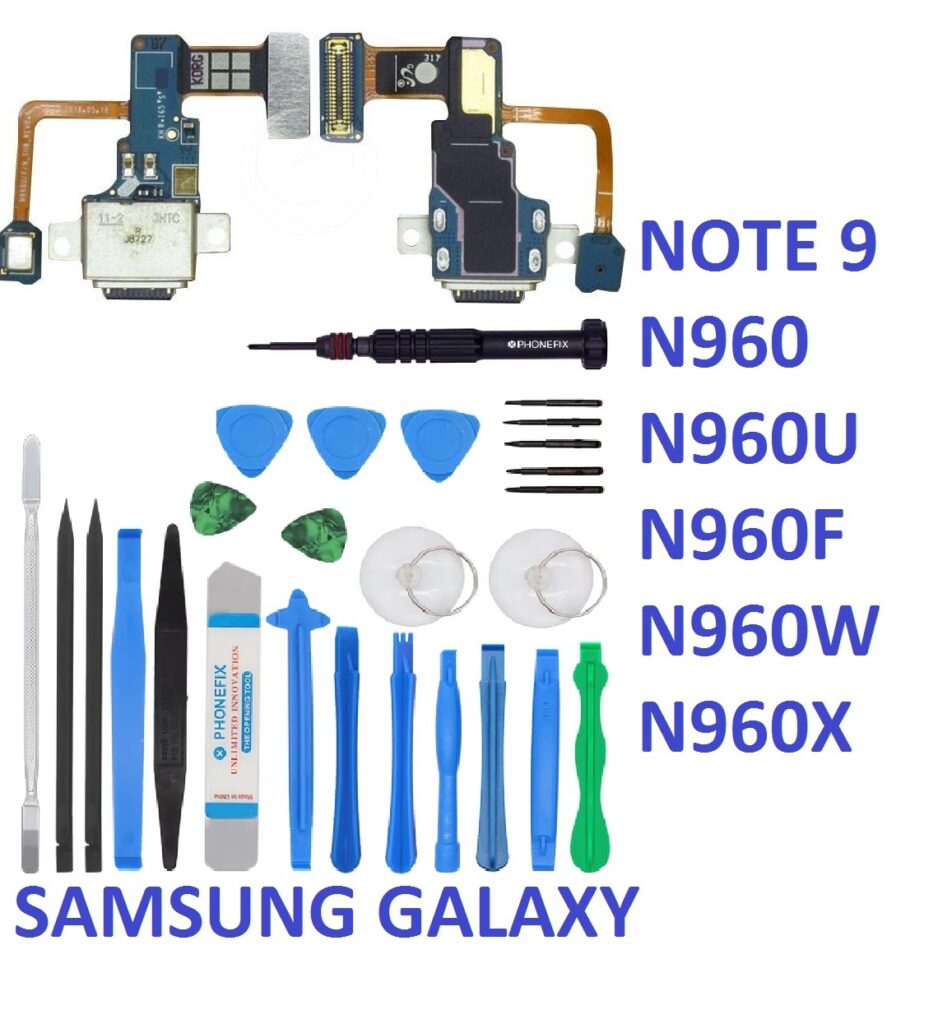
Tools You’ll Need for Replacing the Charging Flex
Before you begin the replacement process, ensure that you have all the necessary tools on hand. Here’s a list of the essential tools you’ll need to replace the charging flex cable in your Galaxy Note 9 N960U/N960F:
- Heat Gun or Hairdryer: Used for softening the adhesive and loosening the back cover.
- Small Phillips Head Screwdriver: To remove screws.
- Plastic Pry Tools: These are non-metallic tools that help you open the phone without damaging or scratching the screen or casing.
- SIM Card Ejector Tool: Used to remove the SIM card tray.
- Tweezers: To handle small components during the repair.
- Suction Cup Tool: Helps lift the back cover of the phone without damaging the glass.
- Plastic Spudger: A non-conductive tool that helps disconnect cables and parts without causing damage.
- ESD Wrist Strap: For grounding yourself to avoid static discharge, which could damage internal components.
- Replacement Charging Flex Cable: The part you’re replacing, ensuring you have the correct version for your phone model (N960U or N960F).
Step-by-Step Guide to Replacing the Charging Flex Cable
Step 1: Prepare Your Workspace
Start by preparing your workspace. Make sure it’s clean, organized, and well-lit. Lay down a soft cloth to protect the phone from scratches, and keep your tools nearby.
Step 2: Power Off the Device
Before you begin the repair, power off your Galaxy Note 9 completely. This will reduce the risk of electric shock or short-circuiting components during the process.
Step 3: Remove the SIM Card Tray
Use the SIM card ejector tool to remove the SIM card tray from the phone. This step is essential to ensure no damage is done to the tray or the phone’s internals.
Step 4: Heat the Back Cover
Use a heat gun or hairdryer to soften the adhesive on the back cover. Apply heat around the edges of the back cover for about 1-2 minutes, ensuring the adhesive becomes soft and pliable.
Step 5: Remove the Back Cover
Once the adhesive has softened, place the suction cup tool near the bottom of the phone’s back cover. Gently pull on the suction cup while using a plastic pry tool to separate the back cover from the phone. Take your time to avoid damaging the glass or cracking it. Carefully work your way around the edges of the phone until the back cover detaches completely.
Step 6: Disconnect the Battery
Now that you have access to the internals, locate the battery connector and use a plastic spudger to gently disconnect the battery. This step is important for preventing any electrical accidents while working on the device.
Step 7: Remove the Screws
Using a small Phillips head screwdriver, remove the screws securing the metal shielding around the charging port area. Keep track of the screws and note their locations for reassembly later.
Step 8: Detach the Old Charging Flex Cable
Once the screws are removed, carefully lift the metal shield and disconnect any cables attached to the charging flex cable. Use a plastic spudger or tweezers to carefully lift the old charging flex cable out of place. Take your time with this step to avoid damaging surrounding components.
Step 9: Install the New Charging Flex Cable
Take the replacement charging flex cable and carefully position it in place. Ensure that the connector aligns with the motherboard properly and securely connect all cables that were previously disconnected.
Step 10: Reassemble the Phone
Once the new charging flex cable is in place, reattach the metal shielding and secure it with the screws. Reconnect the battery and ensure all internal connectors are properly seated.
Step 11: Test the Device
Before sealing the phone back up, power on the device and test the charging functionality. Plug in the charger to see if the phone charges correctly. If everything works as expected, proceed to the next step.
Step 12: Seal the Phone and Reinsert the SIM Card Tray
Once the charging port has been successfully tested, carefully align the back cover and press it into place. Make sure that it clicks in securely. Reinsert the SIM card tray.
Step 13: Final Testing
Perform a final check to ensure that the phone is charging properly and that all functions are working as expected. Test the charging speed, and make sure there are no loose parts or components.
Helpful Tips for a Successful Replacement
- Work Slowly and Carefully: This repair involves delicate components, so it’s important to move slowly and be precise during each step.
- Use Proper Tools: Using the right tools, such as plastic pry tools, reduces the risk of damaging your phone.
- Don’t Force Any Components: If something doesn’t come off easily, reassess the situation and try again. Forcing components can lead to cracks or other damage.
- Ground Yourself to Prevent Static: Static electricity can damage sensitive phone parts. Always use an ESD wrist strap or ground yourself by touching a metal object before working inside the phone.
- Test the Device: Before sealing the phone back up, always test to make sure everything works properly, especially the charging function.
Conclusion
Replacing the charging flex cable on your Samsung Galaxy Note 9 N960U/N960F is a relatively straightforward process if you have the right tools and follow the proper steps. With a little patience and attention to detail, you can restore your phone’s charging functionality and extend the lifespan of your device. Just remember to take your time, be cautious, and ensure that all connections are secure before reassembling the phone.
If you don’t feel confident in performing the replacement yourself, it’s always a good idea to consult a professional technician. Regardless of whether you do it yourself or hire a professional, getting the charging flex cable replaced will help ensure your Galaxy Note 9 continues to perform at its best.
Happy repairing!