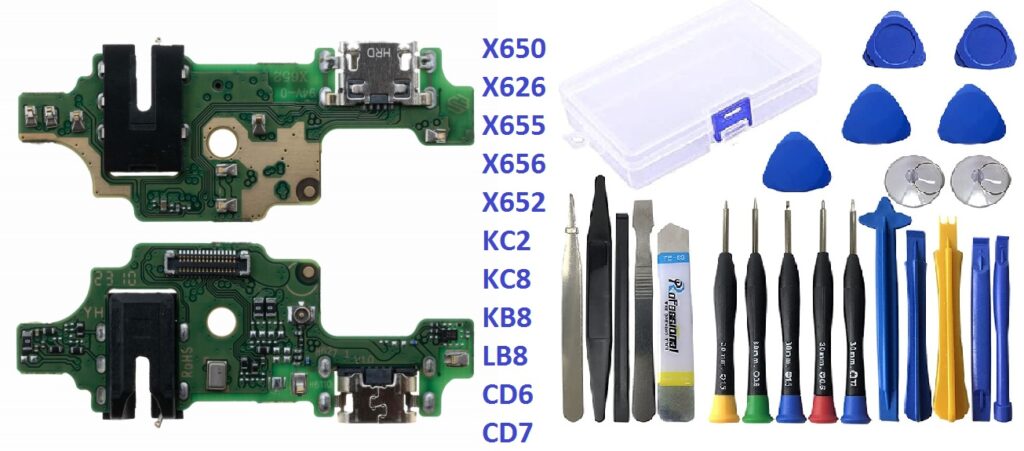
When working with various electronic components, such as charging boards for different models like the X650, X655, X656, X626, X652, KC3, KC2, KC8, LB8, CD6, and CD7, it’s essential to have a solid understanding of compatibility and the right tools for replacements. Whether you’re a DIY enthusiast, a technician, or someone trying to repair their gadgets, this guide will take you through the essential steps to ensure successful replacements and repairs.
Understanding Charging Boards Compatibility
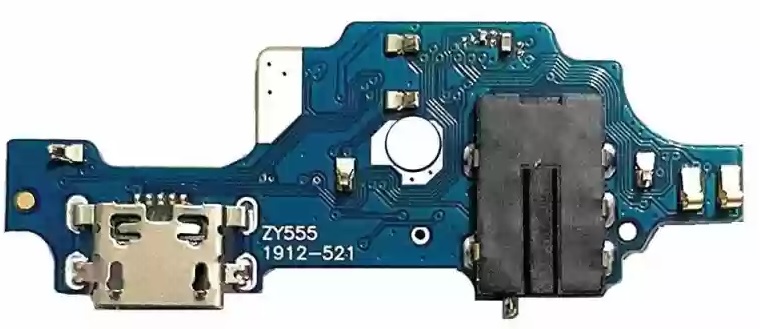
Charging boards are crucial components for managing the power input into devices. These specific models, such as the X650, X655, X656, X626, X652, KC3, KC2, KC8, LB8, CD6, and CD7, require compatible charging boards to ensure that power is distributed effectively and that the battery charging process remains efficient.
Here’s a breakdown of the compatibility of the charging boards for each model:
- X650, X655, X656, X626, X652: These are typically found in power-hungry devices such as drones, camera equipment, or electric vehicles. These models often share similar voltage ratings and charging protocols, which is why you should carefully select charging boards designed for those specific needs.
- KC3, KC2, KC8: These models can be seen in various portable gadgets and robotics. They require charging boards that can handle specific battery types and ensure the device’s longevity by preventing overcharging or deep discharge.
- LB8, CD6, CD7: These might be associated with high-end electronics like medical devices, industrial machines, or battery-operated tools. The compatibility of the charging board with these models will depend on the battery specifications and the power management system of the device.
Selecting the Right Charging Board
When replacing or repairing a charging board, it’s essential to ensure that the replacement is specifically designed for the device you’re working with. Below are a few key considerations for selecting the right charging board:
1. Voltage and Current Rating
Ensure that the charging board matches the voltage and current requirements of the device. Mismatched ratings could damage the device or result in inefficient charging.
2. Battery Type
Different devices use different battery types, such as Li-ion, Li-poly, or NiMH. Make sure the replacement charging board is compatible with the battery type used in your device.
3. Charging Protocol
Devices such as drones or robotics may require a specific charging protocol (such as balancing for multi-cell batteries). Choose a charging board that supports the necessary protocol to optimize battery life and safety.
4. Connector Type
Be sure to check the connector type on both the charging board and your device. Compatibility issues here could make the replacement unworkable.
Essential Replacement Tools
To successfully replace or repair the charging board, you need the right set of tools. Here’s a list of essential tools to get the job done:
1. Soldering Kit
A high-quality soldering iron is essential for connecting or disconnecting wires to the charging board. Make sure to use a soldering iron with an adjustable temperature setting to avoid damaging sensitive components.
2. Multimeter
A multimeter will help you check the electrical current, voltage, and resistance to ensure the board is functioning correctly. It’s essential for diagnosing issues with your current charging board before deciding to replace it.
3. Precision Screwdrivers
A set of small screwdrivers is crucial for disassembling the device safely. Be sure to choose a set with a variety of head types to accommodate different screw sizes.
4. Heat Shrink Tubing and Electrical Tape
These are useful for insulating wires once you’ve made your connections. Proper insulation helps prevent short circuits and ensures the safety of your device.
5. Desoldering Pump or Solder Wick
If you’re replacing a faulty charging board, you may need to remove the old one. A desoldering pump or solder wick will help you safely remove excess solder from the board to ensure a clean connection for the new part.
6. Tweezers
Precision tweezers are invaluable for handling small components on the charging board. These will help you position and install parts without causing damage.
7. Plastic Pry Tools
If you’re opening a device or removing a charging board from a casing, plastic pry tools will help you do so without damaging delicate parts or cracking the casing.
8. Battery Management System (BMS) Analyzer
For advanced repairs, especially on battery-operated systems, a BMS analyzer can help assess the health of your battery pack and ensure that it’s safe to use with the new charging board.
Step-by-Step Process for Replacing the Charging Board
Replacing a charging board can be an intricate task, but following the right steps can make the process smoother.
Step 1: Power Off the Device
Ensure that the device is powered off and unplugged from any power source. This is important to avoid electrical shock or damaging the components.
Step 2: Open the Device
Use precision screwdrivers and plastic pry tools to carefully open the device casing. Be gentle to avoid cracking or damaging the housing.
Step 3: Remove the Old Charging Board
Carefully desolder any connections between the old charging board and the device. Use the desoldering pump to remove the excess solder. Take note of the wiring and make a record or a photo of the connections to help you with the new installation.
Step 4: Install the New Charging Board
Align the new charging board with the connections. Solder the appropriate wires in place and ensure that the connections are solid and secure.
Step 5: Check the Voltage and Current
Use a multimeter to verify that the new board is working correctly. Check the voltage and current to ensure the board is providing the right power to the battery.
Step 6: Reassemble the Device
Once you’ve verified that the new charging board works as expected, carefully reassemble the device, making sure all components are correctly positioned and secured.
Step 7: Test the Device
Turn the device on and test its charging functionality. If it charges correctly, the replacement was successful.
Conclusion
Replacing the charging board on devices like the X650, X655, X656, X626, X652, KC3, KC2, KC8, LB8, CD6, and CD7 can be a straightforward process if you choose the right tools and components. Always check compatibility carefully and follow the replacement steps carefully to ensure success.
By understanding the specific charging requirements for each model and having the right tools at hand, you can keep your devices in top condition and avoid unnecessary downtime.