
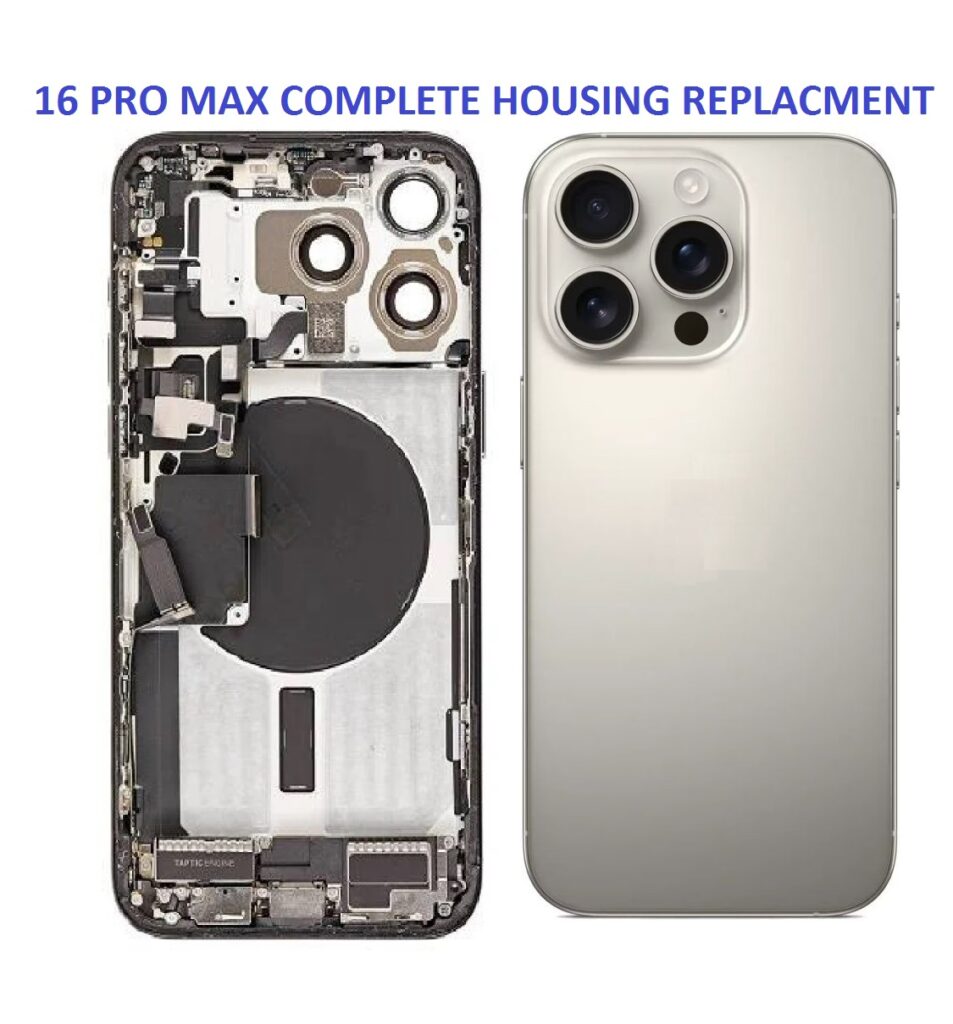
The iPhone 16 Pro Max is a powerhouse of innovation, combining sleek design with cutting-edge technology. However, accidents happen drops, impacts, and daily wear and tear can damage the phone’s housing (the back cover and frame), compromising both aesthetics and functionality. A complete housing replacement is a detailed process that restores your device to its original look and structural integrity. Here’s a full breakdown of how the replacement is professionally done.
Tools and Materials Required
Before starting the replacement, gather the necessary tools:
- Penta lobe screwdriver (for Apple screws)
- Phillips screwdriver
- Tri-point screwdriver
- Plastic opening tools
- Suction cup
- Tweezers
- Heat gun or iOpener
- SIM ejector tool
- Replacement housing (OEM or high-quality aftermarket)
- Anti-static wrist strap (optional but recommended)
Step-by-Step Housing Replacement Process
1. Power Off the Device
Always begin by turning off the iPhone 16 Pro Max to avoid short circuits or damage during disassembly.
2. Remove the SIM Card Tray
Use a SIM ejector tool to remove the SIM tray and keep it in a safe place.
3. Open the Display
- Use a Penta lobe screwdriver to remove the two screws beside the charging port.
- Heat the edges of the phone gently using a heat gun to loosen the adhesive.
- Place a suction cup on the lower half of the screen and gently pull while using a plastic opening tool to separate the screen from the frame.
- Be cautious of flex cables connecting the screen to the logic board.
4. Disconnect the Battery and Display Cables
- Unscrew and remove the shielding that covers the battery and screen connectors.
- Disconnect the battery connector first to prevent power flow.
- Disconnect the screen, Face ID, and front sensor connectors.
5. Remove Internal Components
To fully detach the internal components from the old housing:
- Remove the logic board, cameras, speaker, Taptic Engine, charging port, and buttons.
- Each component is held with small screws and sometimes adhesive—note the exact location and type of each screw.
6. Transfer to New Housing
- Carefully install each component into the new housing, starting with the logic board and moving through cameras, connectors, and the charging port.
- Ensure that all gaskets, water seals, and grounding points are properly aligned to retain water resistance and performance.
7. Reconnect the Display and Battery
- Attach all display connectors back to the logic board.
- Reconnect the battery last.
- Replace the shield over the connectors and screw it back in place.
8. Close and Seal the Phone
- Gently align the screen with the new housing and press it into place.
- Reinsert the two Penta lobe screws at the bottom.
- Power on the device to test functionality.
Post-Replacement Checklist

After reassembling the phone, check the following:
- Screen touch and display clarity
- Face ID functionality
- Camera quality (front and back)
- Sound from speakers and microphone
- Charging port operation
- Button responsiveness (power, volume, mute switch)
- SIM card detection and network signal
Important Notes
- Housing replacement may void your Apple warranty. Always consult with Apple or a certified repair center if your phone is under warranty.
- Use only high-quality parts to ensure durability and maintain device performance.
- Consider professional service if you’re not experienced in phone repairs.
Final Thoughts
A complete housing replacement for the iPhone 16 Pro Max can breathe new life into your device, especially if the frame or back glass is damaged. While the process is complex and requires attention to detail, it’s a worthwhile effort to restore your phone’s original elegance and durability.
If you need expert service, Repair parts hub is here to help. We offer professional iPhone repairs using quality parts and experienced technicians to ensure your device is as good as new.
Need help or have questions? Reach out to us at Repair parts hub – your trusted partner in mobile and tech repair solutions.