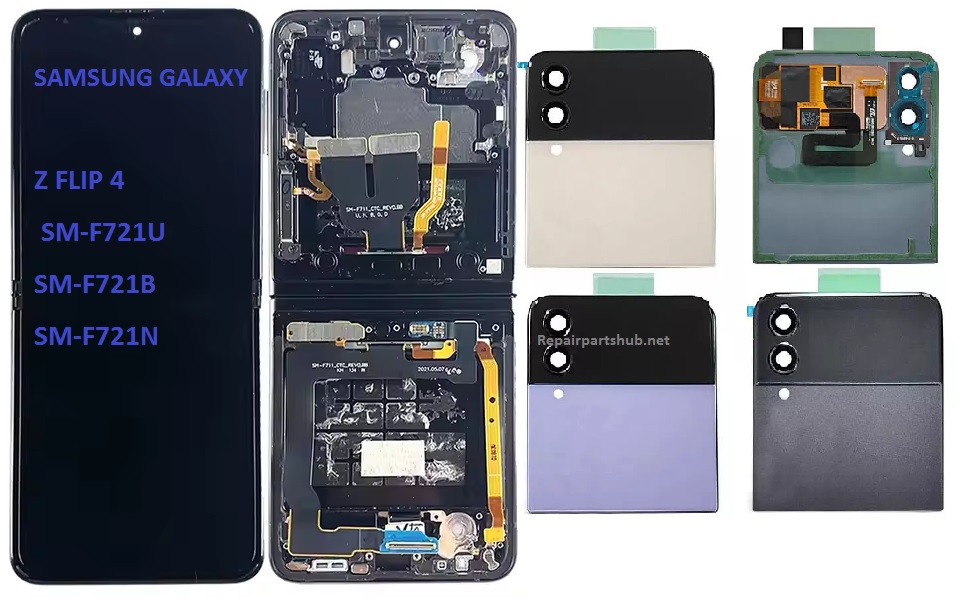
The Samsung Galaxy Z Flip 4 is one of the most innovative foldable smartphones on the market, combining cutting-edge design with powerful technology. However, like any device, accidents happen, and the screen can become damaged. Whether you’ve cracked the screen, experienced touch sensitivity issues, or faced other LCD problems, replacing the screen on your Galaxy Z Flip 4 is possible if you have the right tools and knowledge.
In this blog post, we’ll walk you through the process of replacing the LCD screen for the Samsung Galaxy Z Flip 4 (SM-F721U, SM-F721B, SM-F721N models), including the necessary tools, steps, and some helpful tips to ensure the job is done successfully.
Why Replace the LCD Screen on Your Galaxy Z Flip 4?
Before diving into the replacement process, it’s essential to understand why you might need to replace the screen on your Galaxy Z Flip 4:
- Cracked or Shattered Screen: A cracked or shattered screen is the most common reason for replacement. The Galaxy Z Flip 4’s foldable OLED screen is delicate, and accidental drops or impacts can easily damage it.
- Display Issues: If your screen is experiencing dead pixels, color distortion, flickering, or touch responsiveness problems, a replacement may be necessary.
- Warranty Expiration: If your device is no longer under warranty, performing a DIY repair could save you the cost of professional servicing.
Note: If you’re unfamiliar with phone repairs or lack experience, consider reaching out to a professional to ensure the best results and prevent further damage.
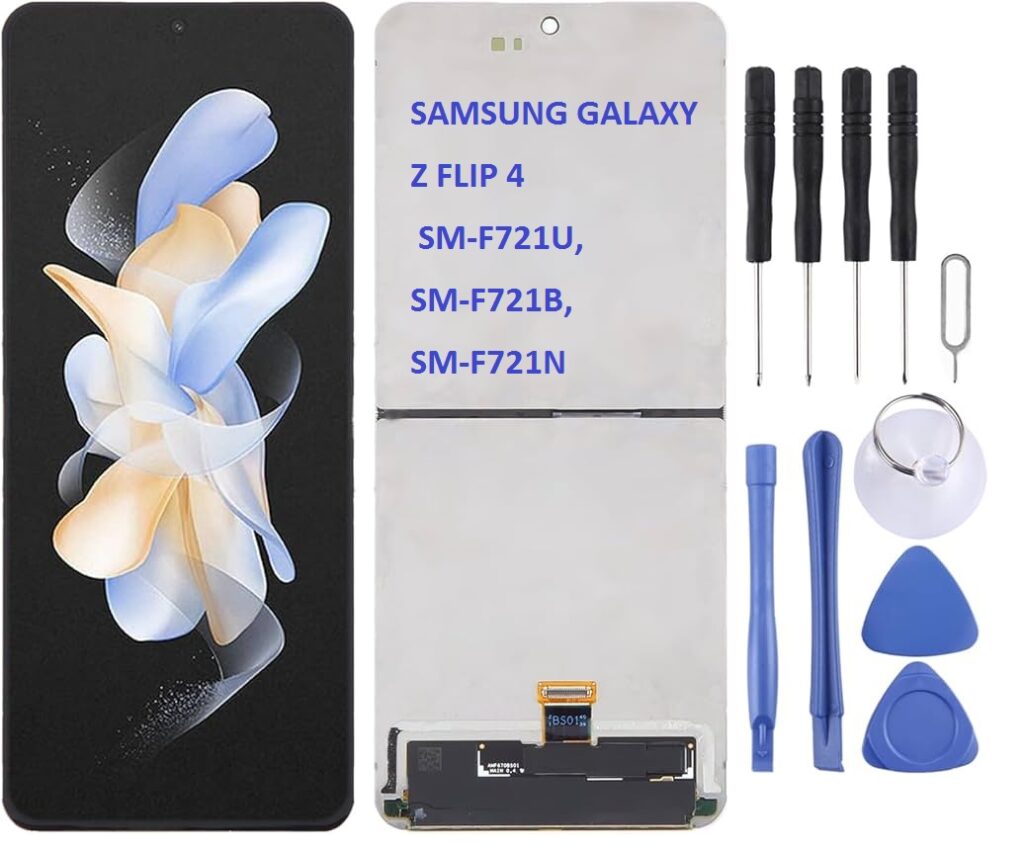
Tools Needed for Samsung Galaxy Z Flip 4 LCD Screen Replacement
To replace the LCD screen on your Galaxy Z Flip 4, you’ll need specific tools designed for phone repairs. Here’s a list of the essential tools you’ll need:
1. Plastic Pry Tools
These are necessary for separating the phone’s screen from the body without causing any damage. Plastic pry tools are preferable to metal tools as they reduce the risk of scratching or damaging internal components.
2. Suction Cup Tool
A suction cup is used to lift the display away from the phone’s body. It provides a secure grip and helps you open the device without putting excessive pressure on the screen.
3. Phillips and Pentalobe Screwdrivers
You’ll need a set of precision screwdrivers, specifically a Phillips #00 and Pentalobe screwdriver. These are ideal for removing the screws holding the screen and other internal components in place.
4. SIM Card Ejector Tool
This tool is essential for removing the SIM card tray, which must be taken out before accessing the internal components of the phone.
5. Heat Gun or Hair Dryer
A heat gun or hair dryer is used to soften the adhesive that holds the screen in place. Heating the device ensures the adhesive becomes less tacky, making it easier to remove the screen without causing damage.
6. Tweezers
Precision tweezers are used for handling small parts and internal components during the replacement process.
7. Adhesive Strips
When installing the new screen, you’ll need fresh adhesive to secure the LCD in place. Pre-cut adhesive strips are a great option for ensuring proper installation.
8. SIM Tray Removal Tool (Optional)
Sometimes, you may need this to remove other internal components like the battery or motherboard for easy access to the screen.
9. Anti-static Wrist Strap (Optional)
An anti-static wrist strap ensures that no static electricity will discharge into the sensitive internal parts of the phone, preventing potential damage during the repair process.
Step-by-Step Process to Replace the LCD Screen on Your Galaxy Z Flip 4
Step 1: Power Off the Device
Before starting any repair, always power off your phone to avoid damaging any internal components. This is an important safety precaution.
Step 2: Remove the SIM Card Tray
Use the SIM card ejector tool to remove the SIM card tray from the phone. This step is necessary to ensure you don’t accidentally damage the tray or internal parts while working on the phone.
Step 3: Heat the Edges of the Phone
Using a heat gun or hair dryer, gently heat the edges of your phone for 2-3 minutes. This will soften the adhesive that holds the screen in place. Be careful not to overheat the phone or the screen itself.
Step 4: Use the Suction Cup Tool
Attach the suction cup to the screen, ensuring it is positioned firmly and securely. Gently pull on the suction cup while using a plastic pry tool to carefully separate the screen from the phone. Work your way around the edges to loosen the screen.
Step 5: Disconnect the Internal Cables
Once the screen is loose, you’ll need to carefully disconnect the internal cables that connect the screen to the motherboard. Use a plastic pry tool or tweezers to carefully lift the connectors and disconnect them one by one.
Step 6: Remove the Damaged LCD Screen
Once all the connectors are disconnected, remove the damaged LCD screen completely. Be cautious, as there may still be some adhesive holding the screen in place. Gently peel it off if necessary.
Step 7: Install the New LCD Screen
Take your new LCD screen and align it with the body of the phone. Carefully connect the display cables to the motherboard and ensure they are secured in place. Make sure everything is aligned correctly before continuing.
Step 8: Reattach the Screen and Secure It
Once the screen is connected, press it gently into place. Apply fresh adhesive strips around the edges to secure the screen. You may need to press down along the edges to ensure the adhesive bonds properly.
Step 9: Power On the Device
Once the screen is securely attached, power on your phone to check the functionality of the new screen. Test the touch sensitivity, display brightness, and color accuracy to ensure everything is working correctly.
Step 10: Reassemble the Phone
If everything is functioning well, carefully reassemble your phone by placing the SIM card tray back into the device. Double-check that all screws and components are properly secured.
Tips for a Successful LCD Screen Replacement
- Take Your Time: Don’t rush the repair process. Be gentle when prying open the phone, and ensure you’re not applying too much force.
- Keep Track of Screws: Keep the screws organized to avoid losing any or mixing them up. Screws from different parts of the phone may be slightly different in size.
- Test Before Sealing: Before applying the final adhesive and sealing the phone, test the new screen to ensure everything is functioning correctly.
- Use Quality Parts: For the best results, use high-quality replacement parts to ensure the longevity and performance of your Galaxy Z Flip 4.
Conclusion
Replacing the LCD screen on your Samsung Galaxy Z Flip 4 can be a rewarding DIY project, but it requires precision and patience. By following the steps outlined above and using the right tools, you can restore your device to its former glory. If you’re unsure about the process, however, it’s always a good idea to seek professional assistance.
With the right tools and know-how, you can enjoy your Galaxy Z Flip 4 for many years to come!