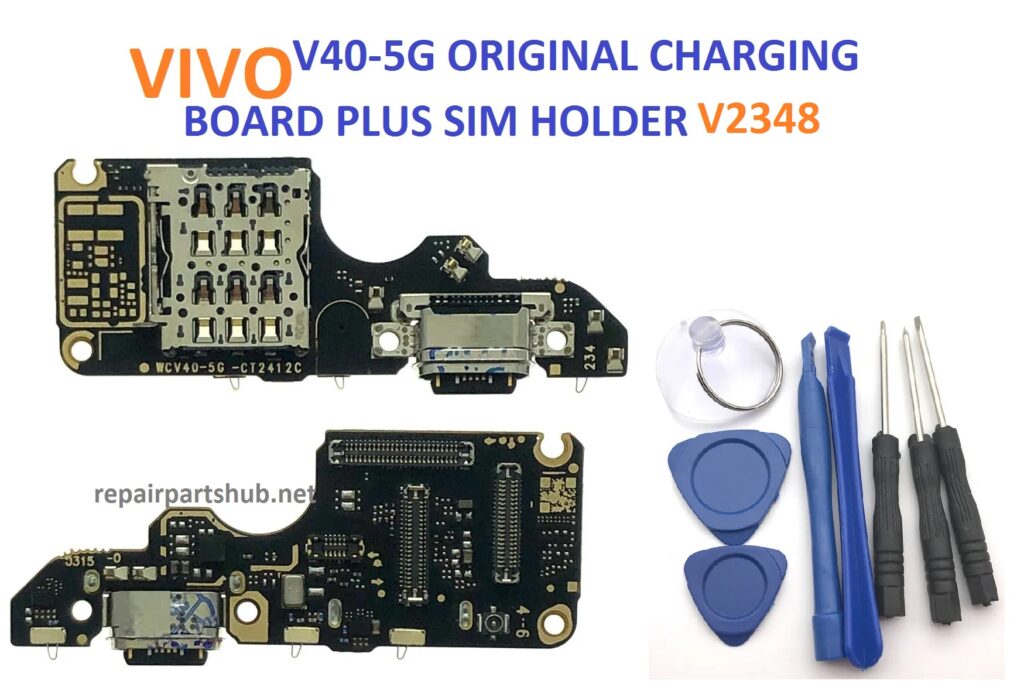
Complete Step-by-Step Guide for Replacing Charging Board + SIM Holder on Vivo V40 5G and V40 Pro 5G
Tools You’ll Need (Expanded)
- Small Phillips Head Screwdriver (to remove screws)
- Plastic Pry Tools (spudgers to separate parts safely)
- SIM Ejector Tool (to remove SIM tray)
- Tweezers (for careful handling of tiny parts)
- Suction Cup Tool (for safely removing the back cover)
- Heat Gun or Hair Dryer (to soften adhesive)
- Anti-Static Wrist Strap (optional, for avoiding static damage to sensitive components)
- Plastic Opening Picks (optional, but useful to carefully separate the components)
- Magnifying Glass or a Lamp with a Good Focus (to better see small components)
Detailed Steps
Step 1: Power Down the Phone
- Completely Power Off the Device: Make sure to turn off the Vivo V40 5G or V40 Pro 5G completely before proceeding. This step is important to avoid short circuits or accidental damage.
Step 2: Remove the SIM Card Tray
- Eject the SIM Tray: Use the SIM ejector tool to carefully remove the SIM card tray from the device. This ensures no pressure is put on the SIM holder when working on the phone. Set the tray aside in a safe place.
Step 3: Remove the Back Cover
- Use the Suction Cup Tool: Start by attaching the suction cup tool near the bottom or middle of the back cover. Gently pull upwards to create a gap between the glass back cover and the rest of the phone.
If the cover feels resistant, apply gentle heat from a heat gun or hair dryer (on low heat) for 1-2 minutes to soften the adhesive. Be careful not to overheat the device.
- Insert the Plastic Pry Tool: Once there’s a gap, insert the plastic pry tool into it and work your way around the edges to carefully detach the back cover from the body of the phone. Do not rush this step. Gradually ease the tool around the edges to minimize risk of cracking the glass.
- Set the Back Cover Aside: Once removed, place the back cover in a safe place, ideally on a soft surface to avoid scratching.
Step 4: Disconnect the Battery
- Locate the Battery Connector: The battery will typically have a connector at the center or lower section of the motherboard. You’ll likely find a protective metal plate covering the connector.
- Unscrew the Protective Shield (if applicable): Use the small Phillips head screwdriver to remove any screws securing this metal shield. Keep these screws safe for reassembly.
- Disconnect the Battery: Use a plastic tool (like a spudger) to carefully disconnect the battery cable from the motherboard. This is a critical step to avoid any accidental power flow during repair.
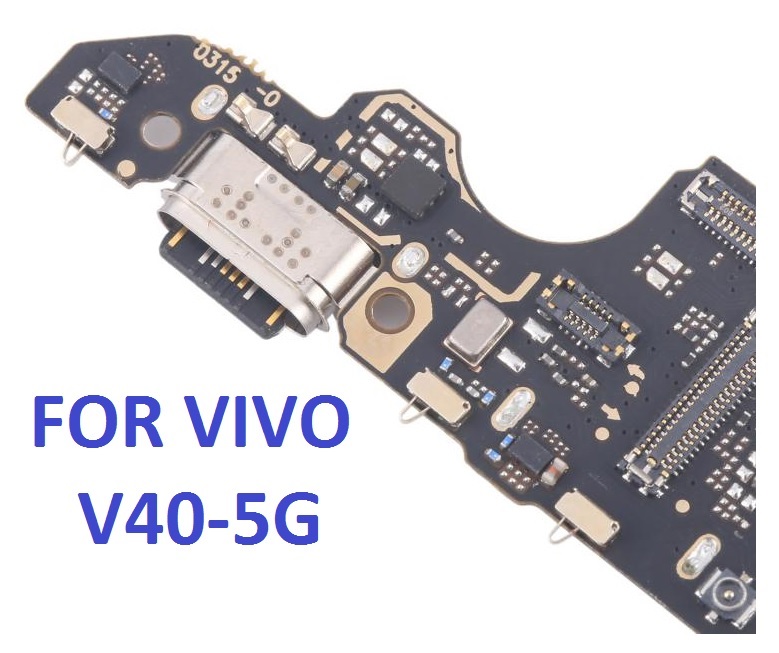
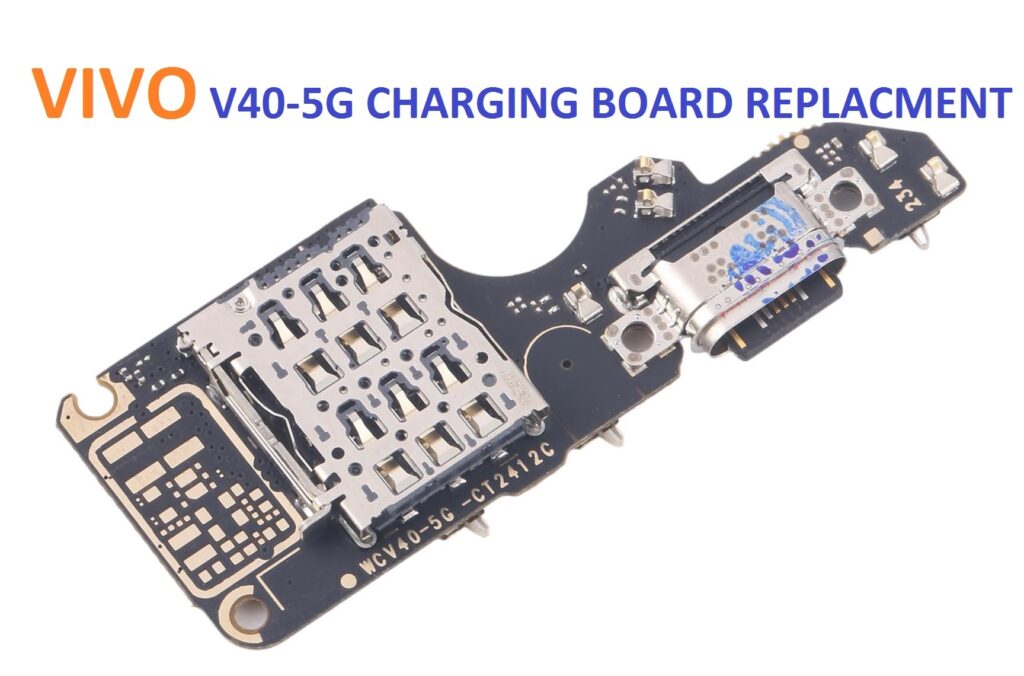
Step 5: Remove the Old Charging Board + SIM Holder
- Locate the Charging Board and SIM Holder: The charging board is typically located at the bottom of the phone, and the SIM holder might be integrated into this assembly.
- Unscrew the Board: There will be several screws securing the charging board to the phone’s frame. Use your screwdriver to remove all screws. Make sure to note where each screw goes for easier reassembly.
- Disconnect the Cables: The charging board is likely connected to various cables such as:
- USB Charging Port Cable
- Antenna Cables
- Ribbon Cables to the Mainboard
Use tweezers or a plastic pry tool to carefully disconnect each of these cables. Be gentle to avoid damaging the connectors or the cables.
- Remove the Charging Board: Once all screws and connectors are removed, lift the charging board out carefully. If the part is stuck due to adhesive, gently apply heat from the heat gun for a few seconds to loosen the adhesive.
- Remove the SIM Holder: If the SIM holder is integrated into the charging board, it should come out with the board. If it’s a separate piece, remove it carefully after unscrewing or disconnecting any connectors.
Step 6: Install the New Charging Board + SIM Holder
- Place the New Charging Board: Position the new original charging board (with the SIM holder) into the same position from where the old one was removed. Make sure all the connectors align perfectly.
- Reconnect the Cables: Start by reconnecting the USB charging port cable, antenna cables, and any ribbon cables that were disconnected. Ensure each connector clicks into place without excessive force.
- Screw the Board Back in Place: Secure the new charging board by screwing it back into the phone frame using the screws you previously removed. Tighten the screws securely but don’t overtighten them to avoid cracking the motherboard.
- Reattach the SIM Holder (if separate): If the SIM holder was removed separately from the charging board, now is the time to attach the new SIM holder in place. Ensure that it’s locked in securely.
Step 7: Reconnect the Battery
- Reconnect the Battery Cable: Now that the charging board and SIM holder are in place, reconnect the battery cable to the motherboard. Use a plastic spudger or your fingers to gently press the battery connector back into its slot.
- Reattach the Battery Shield (if applicable): If the battery was covered by a protective metal shield, secure it back in place by screwing it down with the screws you previously removed.
Step 8: Reassemble the Device
- Replace the Back Cover: Position the back cover of the phone back onto the device. Start by aligning the edges and press down firmly to snap it into place. Ensure that no dust or debris is trapped between the back cover and the phone body.
- Press Along the Edges: Run your fingers along the edges of the back cover to ensure it’s properly seated and fully attached.
Step 9: Power On and Test the Device
- Power On the Phone: Hold down the power button for several seconds to turn the device back on.
- Test the Charging Functionality: Plug the phone into a charger and see if the charging port is working correctly. Look for the charging symbol on the screen to confirm the connection is established.
- Test the SIM Slot: Insert a SIM card into the new SIM holder. Check whether the phone detects the SIM card and connects to your carrier network. Test it by making a call or checking mobile data.
Additional Tips for Success:
- Take Your Time: Don’t rush the process. The phone’s internals are delicate, and mishandling components can result in further damage. Be patient and gentle.
- Organize Screws and Parts: Keep the screws and small parts in a labeled container or on a magnetic mat to avoid losing any pieces.
- Check for Loose Connections: Double-check all cable connections before reassembling the device. A loose ribbon cable can prevent the phone from functioning correctly.
- Test After Each Step: After reassembling the phone, test it to ensure the replacement was successful. This way, if something is wrong, you can fix it before fully closing the device.
Troubleshooting (In Case Something Goes Wrong)
- Phone Won’t Turn On After Replacement:
- Ensure the battery is properly connected to the motherboard.
- Check if any internal cables or connectors were missed or not fully connected.
- Charging Still Not Working:
- Double-check the charging port and USB cables for any issues.
- Inspect the new charging board and SIM holder for visible defects.
- SIM Card Not Detected:
- Verify that the SIM holder is properly aligned and securely connected to the motherboard.
- Try testing with a different SIM card to rule out SIM card issues.
Conclusion
Replacing the charging board and SIM holder on the Vivo V40 5G and Vivo V40 Pro 5G is a relatively straightforward process if you follow the detailed steps carefully. However, attention to detail is critical, especially when handling delicate internal components. Always ensure that you use original replacement parts to maintain the integrity of the phone.