Is your Huawei Nova 10 SE screen cracked, unresponsive, or displaying unusual colors? Don’t worry you can restore your device to like-new condition by replacing the LCD screen with digitizer full assembly. This guide covers everything you need to know, from choosing the right screen to performing the replacement safely.
Compatible Models
Before we get into the replacement process, make sure your device matches one of these model numbers:
- BNE-LX1
- BNE-LX3
You can confirm your model in the phone’s settings:
Settings > About Phone > Model Number
What is a Digitizer Full Assembly?
The digitizer full assembly includes both the LCD screen and the touchscreen digitizer fused together. This makes the replacement process easier and more efficient since you’re swapping out the entire display unit rather than trying to separate and replace individual components.
Benefits of Full Assembly Replacement:
- Easier installation
- Improved touchscreen responsiveness
- Fewer risks of dust or screen misalignment
Tools & Parts You’ll Need
Parts:
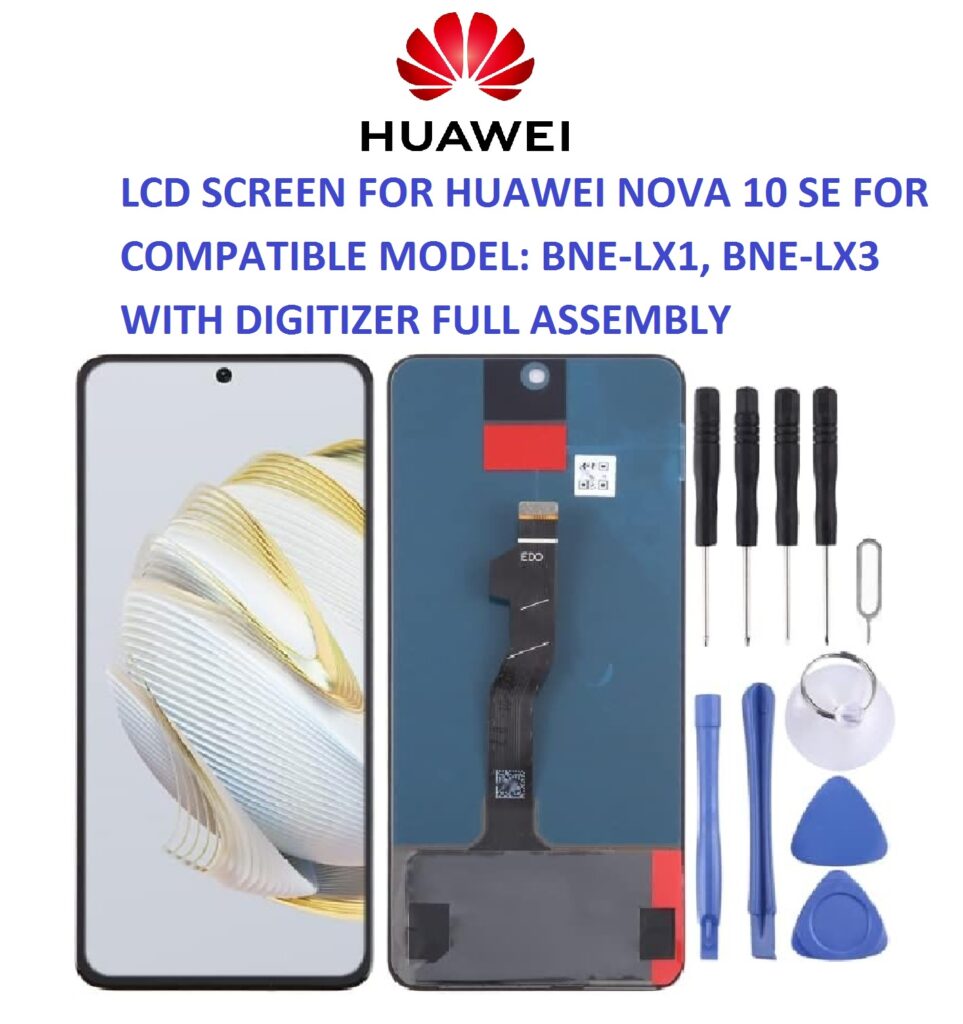
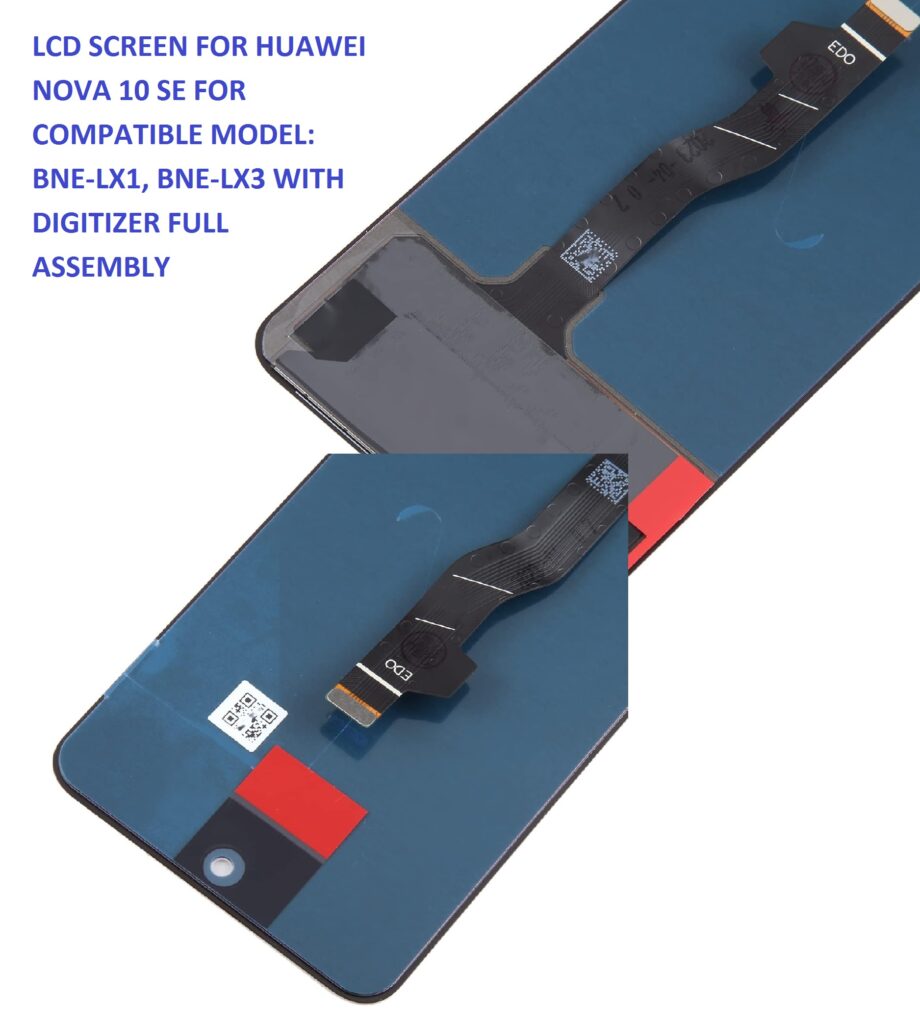
- Replacement LCD Screen + Digitizer Full Assembly (compatible with BNE-LX1, BNE-LX3)
- Adhesive tape or screen glue
Tools:
- Precision screwdriver set
- Plastic pry tools
- Suction cup
- SIM tray ejector pin
- Tweezers
- Heat gun or hair dryer
- Anti-static wrist strap (recommended)
Step-by-Step Replacement Process
Note: If you’re not experienced with phone repairs, consider consulting a professional. Attempting the repair without proper tools or experience can damage the device.
Step 1: Power Off and Eject SIM Tray
Turn off the device completely and eject the SIM card tray using the pin tool.
Step 2: Remove the Back Cover
Use a heat gun (low setting) or a hair dryer to warm the edges of the back cover. This loosens the adhesive.
Use a suction cup and plastic pry tool to gently lift and separate the back panel. Work slowly around the edges.
Step 3: Disconnect the Battery
After removing the back cover, locate the battery connector and disconnect it to prevent any short circuits.
Step 4: Unscrew and Remove Internal Covers
Use the precision screwdriver to remove screws securing the internal protective covers. Gently lift these covers using plastic tools.
Step 5: Disconnect Display Cables
Carefully disconnect the LCD and digitizer flex cables from the motherboard.
Step 6: Remove the Broken Screen
Apply heat to the screen edges to soften adhesive. Use the suction cup and pry tool to lift the screen. Gently remove it from the frame.
Step 7: Clean the Frame
Remove any leftover adhesive or debris from the phone’s frame. This ensures the new screen fits securely.
Step 8: Install the New LCD Screen
Align the new screen’s flex cables and carefully attach them to the motherboard. Once connected, test the screen by temporarily reconnecting the battery and powering the phone on.
Check for:

- Proper display brightness
- Touch sensitivity
- Color accuracy
- No dead pixels
If everything works, turn off the phone again.
Step 9: Seal the Screen
Apply adhesive tape or screen glue around the frame. Place the new screen firmly onto the phone and press gently to secure.
Step 10: Reassemble the Phone
Reconnect the battery, reinstall protective covers, screw them in, and reattach the back cover using fresh adhesive. Insert the SIM tray.
Important Tips
- Always use ESD-safe tools to prevent damage from static electricity.
- Be gentle when lifting connectors—force can tear flex cables.
- Test the screen before sealing the phone to save time and effort.
Where to Buy Genuine Parts
Make sure to buy your screen assembly from reputable sellers or OEM-certified suppliers. Look for phrases like:
- “100% Tested Before Shipping”
- “OEM Quality”
- “Compatible with BNE-LX1 / BNE-LX3”
Avoid overly cheap parts, as they may be refurbished or low-quality copies.
Final Thoughts
Replacing the LCD screen with digitizer full assembly on your Huawei Nova 10 SE (BNE-LX1 or BNE-LX3) is a practical solution to a cracked or unresponsive display. With the right tools and careful attention to detail, you can complete the repair at home and extend the life of your device.
If you’re unsure about DIY repair, it’s always safe to consult a certified technician. But for confident tinkerers, this fix can be both satisfying and cost-effective.
Need help choosing the right part or tools? Drop a comment below or reach out for product recommendations.