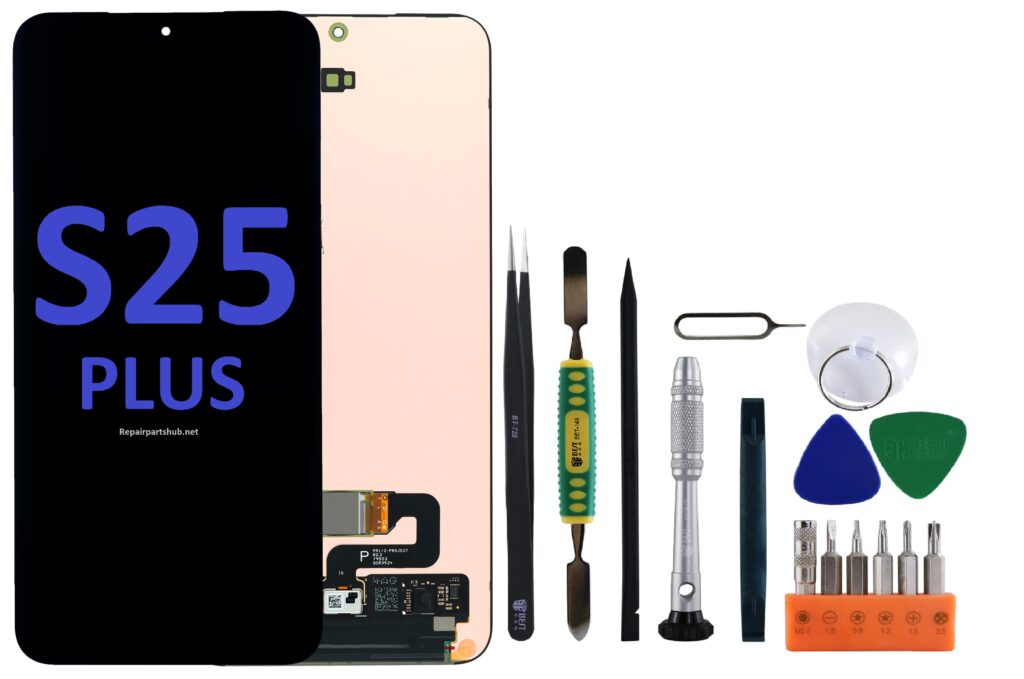
The Samsung Galaxy S25 Plus (SM-S936B, SM-S936B/DS, SM-S936U, SM-S936U1, SM-S936W, SM-S936N, SM-S9360, SM-S936E, SM-S936E/DS) is an advanced flagship device boasting a high-quality display, powerful features, and sophisticated design. However, even the best phones can suffer from cracked screens or damaged displays, which is why it’s essential to understand the process of replacing the screen yourself, along with the right tools needed for a successful repair. In this blog post, we’ll cover everything you need to know about replacing the Samsung Galaxy S25 Plus screen, the various models involved, and the necessary tools for the job.
Why Replace the Screen?
A damaged screen can severely impact the user experience, making it harder to interact with the device. If you’re noticing cracks, dead pixels, touch issues, or even a completely shattered display, replacing the screen is crucial to restore the device’s functionality. Samsung devices, including the S25 Plus, are equipped with OLED displays, which are known for their vibrant colors, deep blacks, and overall excellent image quality. As such, replacing a damaged screen with an original Samsung part ensures you maintain the highest quality performance.
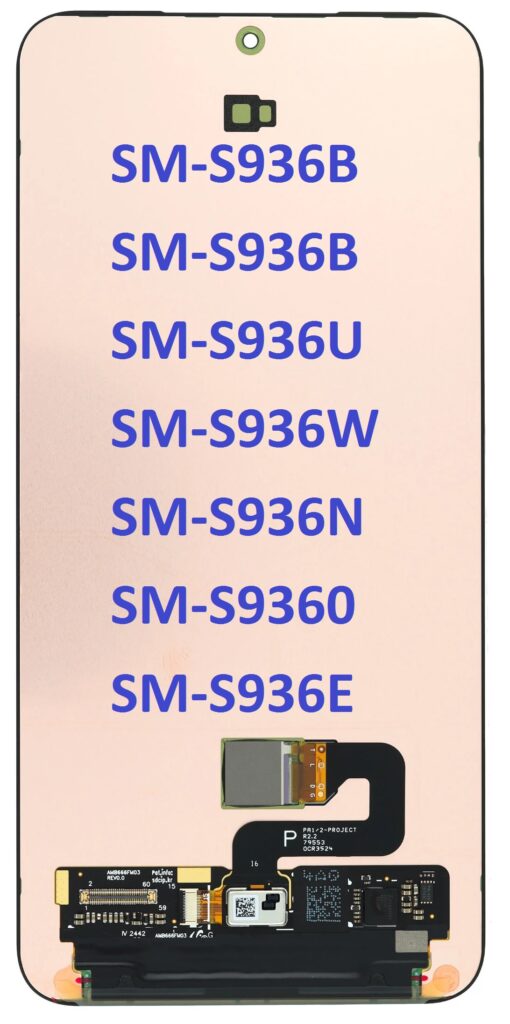
Understanding the Models: SM-S936B and Variants
Before diving into the screen replacement process, it’s important to understand the various model numbers associated with the Samsung Galaxy S25 Plus. These models may be region-specific or carrier-specific variants but share similar hardware, including the display.
- SM-S936B – The standard model of the Samsung Galaxy S25 Plus, sold in many regions.
- SM-S936B/DS – A dual SIM version of the standard model.
- SM-S936U, SM-S936U1 – These are the models sold in the United States, with the “U1” variant typically being unlocked for all carriers.
- SM-S936W – Sold in Canada and certain other regions.
- SM-S936N – Likely a model tailored for specific markets like South Korea.
- SM-S9360 – A more global variant with international compatibility.
- SM-S936E, SM-S936E/DS – These variants cater to European markets, with “DS” indicating dual SIM support.
While each model may differ slightly in terms of network compatibility, the screen replacement process remains the same across these variants. It’s crucial, however, to purchase the correct screen replacement compatible with your specific model number.
Why Use an Original Screen Replacement?
When replacing the screen on your Samsung Galaxy S25 Plus, using an original (OEM) screen is highly recommended. Here’s why:
- Color Accuracy: Original displays offer superior color reproduction and brightness compared to aftermarket parts.
- Touch Sensitivity: Samsung’s original displays are designed to be fully responsive to touch gestures. Aftermarket parts may have slower touch response or exhibit inconsistencies.
- Durability: OEM screens are built to withstand the wear and tear of everyday use, ensuring longevity.
- Warranty Considerations: Using original parts ensures that your warranty remains intact (if applicable) or that you don’t void any potential repair warranties.
Although it may be tempting to save money by opting for third-party replacement screens, they may not offer the same performance or reliability as an authentic Samsung part.
Tools You’ll Need for the Job
Replacing the screen of your Samsung Galaxy S25 Plus requires precision and the right tools. Here’s a list of tools you’ll need to successfully replace the screen and minimize the risk of damaging the device further.
1. Heat Gun or Heat Pad
A heat gun or heat pad is essential for loosening the adhesive that holds the screen to the body of the device. Apply moderate heat to the edges of the screen to make the adhesive more pliable, which will make removal easier without damaging the internals of the phone.
2. Plastic Pry Tools
Plastic pry tools are ideal for separating the screen from the frame of the phone. Metal tools can scratch or damage the device, so plastic tools are a safer option. You may need to use several pry tools to carefully lift the screen away.
3. Suction Cup Tool
A suction cup is used to gently lift the screen off the device once the adhesive is softened. Ensure you’re using a high-quality suction cup to avoid any damage to the screen during removal.
4. Pentalobe Screwdriver
A pentalobe screwdriver is necessary for opening the device. It’s used to remove the screws that hold the frame together. This is a specialized tool that’s required for Samsung devices, as they use pentalobe screws to secure parts.
5. Tweezers
Tweezers are used for handling small internal components such as the flex cables and connectors. When working inside your phone, precision is key, and tweezers allow you to delicately manipulate these tiny parts.
6. SIM Card Ejector
Before beginning the repair, it’s essential to remove the SIM card tray to avoid damaging it. A SIM card ejector tool will make this process quick and easy.
7. Adhesive Tape
After removing the old screen, you will need to apply new adhesive tape to secure the replacement screen. Make sure the adhesive is strong and durable to avoid any future lifting or loosening of the screen.
8. Replacement Screen
This is the most crucial tool. Always ensure you’re getting an authentic Samsung Galaxy S25 Plus screen for the best fit and performance. You can find original Samsung screens through trusted suppliers or authorized service centers.
Step-by-Step Guide to Replacing the Screen
- Power Off the Device: Always ensure the phone is powered off before starting the replacement process to avoid any accidental damage to the internal components.
- Remove the SIM Card Tray: Use the SIM card ejector tool to remove the SIM card tray to avoid interference during the repair.
- Apply Heat to Loosen the Adhesive: Use a heat gun or heat pad to apply gentle heat to the edges of the phone for around 1-2 minutes to soften the adhesive holding the screen in place.
- Use the Suction Cup and Pry Tools: Attach the suction cup to the screen and gently pull to create a small gap. Insert a plastic pry tool into the gap and carefully work your way around the device to separate the screen from the body.
- Disconnect the Internal Components: Once the screen is removed, you’ll need to disconnect the internal flex cables and connectors from the motherboard. Use tweezers and a small screwdriver to remove any screws that are securing the connectors in place.
- Install the New Screen: Place the new screen on the device and reconnect the flex cables to the motherboard. Be sure to align the connectors carefully to avoid damaging any parts.
- Secure the Screen: Once the screen is connected, apply new adhesive to secure the screen in place. Make sure the adhesive is even and covers all edges to prevent the screen from lifting.
- Test the New Screen: Before sealing up the device, power it on to test the new screen. Check for touch responsiveness, screen brightness, and any display issues.
- Reassemble the Device: Once you’ve confirmed everything is working as expected, carefully reassemble the phone, replacing screws, the SIM card tray, and any other components.
Conclusion
Replacing the screen of your Samsung Galaxy S25 Plus can be a rewarding experience if you have the right tools and a bit of patience. By following this guide, you’ll not only save money on professional repairs but also gain the satisfaction of fixing your device yourself. Always use original parts to ensure your phone maintains its quality, and remember that the right tools are crucial for a smooth and successful screen replacement.
If you don’t feel comfortable performing the replacement yourself, it’s always a good idea to consult with professional technicians who specialize in Samsung repairs. Regardless of your choice, ensuring that the screen is replaced with an OEM part will keep your device in top condition for years to come.
Happy repairing!