The Samsung Galaxy SM-S918B/DS is a top-of-the-line device that offers cutting-edge features, beautiful design, and long-lasting performance. However, like all smartphones, over time, the battery in your Galaxy phone may begin to degrade. A drop in battery performance could result in the phone running out of power more quickly, or even prevent it from charging at all. In such cases, a battery replacement becomes necessary.
This blog will guide you through the entire process of replacing the battery of your Samsung Galaxy SM-S918B/DS and list the essential tools you’ll need. Whether you’re looking to repair your phone yourself or simply understand how it’s done, this guide will cover all the key details.
Why Replace the Battery in Your Samsung Galaxy S23 ULTRA SM-S918B/DS?
Before jumping into the replacement process, it’s important to understand why replacing the battery might be necessary. Here are some common signs that indicate your phone’s battery might need replacement:
- Rapid Battery Drain: If your device discharges too quickly even after performing a factory reset or limiting background apps, it’s likely that the battery’s capacity has worn down.
- Failure to Charge: If your Galaxy SM-S918B/DS is no longer charging properly or doesn’t charge past a certain percentage, the battery might be damaged.
- Battery Swelling: Swollen batteries can cause physical damage to the phone and pose a safety risk. If your phone’s back cover or screen is bulging, it’s a sign the battery may be swollen and needs to be replaced immediately.
- Phone Overheating: Excessive heat during use or charging is a typical sign of a malfunctioning battery. This could lead to further damage to internal components.
Tools You Will Need for Samsung Galaxy SM-S918B/DS Battery Replacement
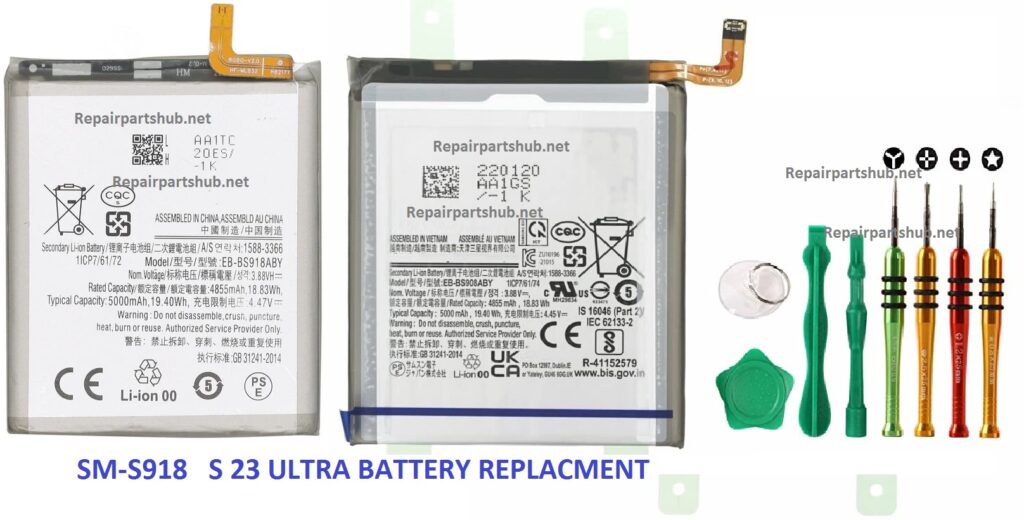
To replace the battery in your Samsung Galaxy SM-S918B/DS, you’ll need a few essential tools. Having the right tools will ensure that the process is smooth, effective, and damage-free.
1. Small Phillips Head Screwdriver
You’ll need a small Phillips head screwdriver to remove screws in your phone. This is typically used to unscrew the screws on the back cover and around the battery compartment.
2. Pentalobe Screwdriver
Some models, especially those with a tightly sealed structure like the Galaxy series, use pentalobe screws. A pentalobe screwdriver is necessary to open the phone carefully.
3. Plastic Pry Tools
Plastic pry tools are crucial to open the device without causing damage. These tools help to separate the back cover from the main body of the phone without leaving visible marks or cracks.
4. Suction Cup Tool
A suction cup tool is ideal for lifting the phone’s back cover safely, particularly if the adhesive is strong. This allows you to remove the cover without applying too much force, minimizing the risk of screen or body damage.
5. Tweezers
Tweezers will be necessary for carefully handling delicate components and wires inside your device, particularly for removing the battery connector or reattaching parts once you’ve replaced the battery.
6. SIM Card Ejector
If your phone’s SIM tray blocks the screws you need to access for disassembly, use a SIM card ejector to remove it before proceeding.
7. Battery Adhesive Strips
Once the old battery is removed, you’ll need adhesive strips to secure the new battery in place. These are especially helpful in preventing the battery from moving once reassembled.
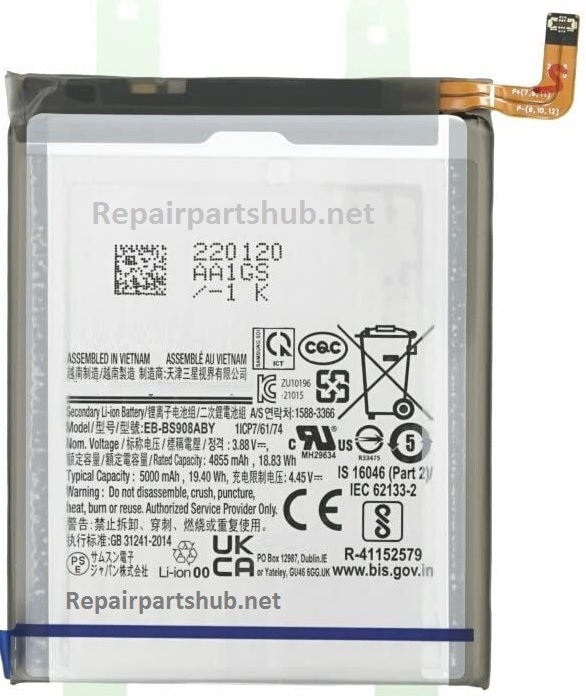
8. New Battery (SM-S918B/DS Compatible)
Of course, you’ll need to buy a new, compatible battery. Ensure you’re getting a battery specifically designed for the Galaxy SM-S918B/DS to avoid any issues with fit or power.
9. Heat Gun or Hair Dryer
A heat gun (or hair dryer) can soften the adhesive used on the back cover of your phone, making it easier to remove. You should apply the heat gently, without overdoing it, to avoid damaging the internal components.
10. Anti-Static Wrist Strap (Optional)
To prevent static electricity from damaging your phone’s internal parts, it’s a good idea to use an anti-static wrist strap.
Step-by-Step Process for Samsung Galaxy S23 ULTRA SM-S918B/DS Battery Replacement
Here is a detailed, step-by-step guide to help you replace the battery in your Samsung Galaxy SM-S918B/DS.
Step 1: Power Off the Device
Before you start, make sure the phone is completely powered off. This prevents any accidental damage to the phone’s electrical components during disassembly.
Step 2: Remove the SIM Card Tray
Using the SIM card ejector, carefully remove the SIM card tray. This will give you access to screws that might be hidden by the tray.
Step 3: Heat the Back Cover
Using a heat gun or hair dryer, heat the back cover of the phone for about 30-60 seconds. This softens the adhesive used to attach the cover, making it easier to pry open. Be careful not to overheat the phone.
Step 4: Pry Open the Back Cover
Use a suction cup tool and gently pull the back cover away from the phone. Insert a plastic pry tool to work your way around the edges, carefully separating the cover from the body of the phone. Avoid using metal tools as they can scratch or damage the device.
Step 5: Unscrew the Screws
Once the back cover is removed, use the appropriate screwdriver to remove all the screws securing the internal components. Keep track of the screws as they can be of varying sizes.
Step 6: Disconnect the Battery Connector
Locate the battery connector and gently use tweezers or a plastic tool to disconnect it from the motherboard. Make sure not to apply excessive force to avoid damaging any wires or circuits.
Step 7: Remove the Old Battery
Carefully remove the old battery from its compartment. Some batteries might have adhesive securing them, so you may need to use plastic tools or adhesive remover to detach the battery. Take care not to puncture or bend the old battery, as it can be hazardous.
Step 8: Install the New Battery
Place the new battery into the compartment and connect it to the motherboard. Ensure it fits snugly and that the connector is securely in place. Use adhesive strips if necessary to keep the battery in position.
Step 9: Reassemble the Phone
After the new battery is installed and connected, reassemble the phone by reversing the disassembly steps. Screw the internal components back in place, and attach the back cover.
Step 10: Power On the Device
Once everything is securely in place, power on your Samsung Galaxy SM-S918B/DS. Ensure that the battery is charging correctly and that the phone is functioning as expected.
Safety Considerations
- Battery Disposal: Do not dispose of old batteries in regular trash. Take them to a recycling facility or authorized collection center to ensure safe disposal.
- Caution with Heat: When applying heat to soften adhesive or remove components, ensure you are using low, controlled heat. Excessive heat can cause internal damage.
- Avoid Using Non-Original Parts: For long-term performance, it’s best to replace the battery with an official or high-quality compatible battery designed specifically for the Galaxy SM-S918B/DS.
Conclusion
Replacing the battery on your Samsung Galaxy SM-S918B/DS can breathe new life into your device and restore its performance. Whether you are an experienced DIY technician or just someone looking to save money, following the right steps and using the correct tools is key to a successful battery replacement.
If you’re not comfortable performing this replacement yourself, it’s always a good idea to seek help from a professional repair service. But with the right tools and careful steps, you can confidently perform the replacement and keep your phone running like new.