The Samsung Galaxy Z Flip 2 5G (model F707B) and the original Z Flip 1 4G (model SM-F700) are some of the most exciting foldable smartphones on the market. Known for their innovative folding screens and premium design, these phones offer a unique blend of style and function. However, just like any other phone, the Z Flip models are susceptible to damage, especially the screen. The good news is that screen repairs are possible, and with the right tools and replacement parts, you can restore your device to its original condition. In this guide, we’ll walk you through the process of replacing the 6.7″ AMOLED LCD display touch screen assembly for both the Samsung Z Flip 2 5G F707B and Z Flip 1 4G SM-F700, covering essential tools and tips for a successful repair.
Why Replace the AMOLED LCD Screen on Your Samsung Z Flip?
The AMOLED screen on the Samsung Z Flip series is one of its standout features, offering vibrant colors, deep blacks, and exceptional clarity. However, like all displays, the screen can suffer from various issues such as:
- Cracked or shattered glass: Accidental drops or impacts can lead to visible cracks.
- Touchscreen malfunctions: The screen may stop responding to touch inputs or register phantom touches.
- Dead pixels or discoloration: Sometimes the AMOLED screen can develop dead pixels or irregular color patches.
If you’re facing any of these issues, replacing the AMOLED LCD screen can restore the functionality of your Samsung Z Flip, making it look and work like new again.
What’s Included in the Replacement Assembly?
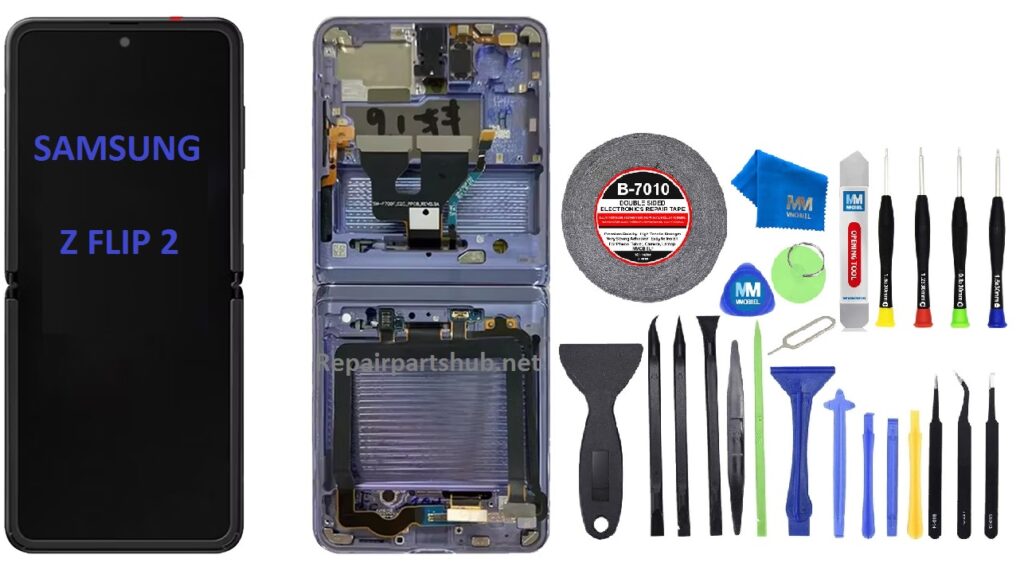
When you purchase a replacement LCD assembly, it typically includes the following components:
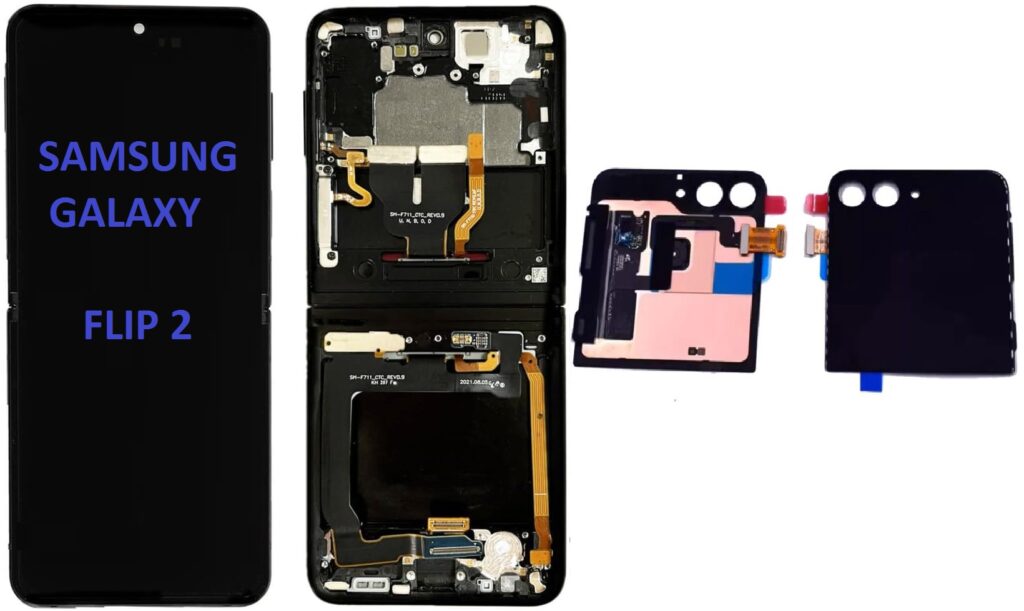
- 6.7” AMOLED LCD Screen: This is the main display, which is responsible for providing the vivid, high-resolution image quality you expect from your Z Flip.
- Digitizer (Touch Screen Layer): This layer is responsible for the touch functionality of your device. It ensures that the touch input is correctly detected and transmitted to the phone’s processor.
- Frame and Housing: The screen assembly often comes with the housing that holds the screen securely in place. This is an essential part of the assembly as it ensures the screen fits precisely in the device.
Make sure to buy the replacement screen specific to your model, either Z Flip 1 4G SM-F700 or Z Flip 2 5G F707B, as the components may vary slightly.
Tools You’ll Need for the Repair
Replacing the AMOLED LCD screen on a Samsung Z Flip requires a specific set of tools to ensure the process goes smoothly. Here’s a list of tools you’ll need:
- Suction Cup Tool: A suction cup helps lift the glass without damaging the screen or the phone’s frame.
- Plastic Pry Tools: These tools are ideal for gently prying open the device without causing scratches or damage to the surface.
- Heat Gun or Hair Dryer: To soften the adhesive holding the screen in place, a heat source will help make the process easier and less risky.
- Tweezers: To handle delicate parts like cables and connectors during the repair.
- Small Phillips Head Screwdriver: To remove screws that hold the internal components in place.
- SIM Card Ejector Tool: If necessary, you might need to remove the SIM tray before starting the repair.
- Plastic Spudger: A plastic spudger is useful for disconnecting cables and removing the old screen.
- Anti-Static Wrist Strap (Optional): This will protect your phone’s internals from static electricity that could cause damage.
Step-by-Step Guide to Replacing the AMOLED LCD for Samsung Z Flip
Now that you have your replacement parts and tools ready, it’s time to begin the repair. Make sure to work in a clean, dust-free environment to avoid contamination during the process. Follow these steps carefully:
Step 1: Power Down Your Device
Before starting the repair, turn off your Samsung Z Flip to avoid any risk of short-circuiting the components.
Step 2: Remove the Back Cover and Battery (Optional)
You may need to remove the back cover of the Z Flip to access the internal components. Use your SIM card ejector tool to remove the SIM tray, and then use your plastic pry tools to gently open the back cover. If you wish to remove the battery for safety, use your screwdriver to unscrew the screws holding it in place and disconnect the battery.
Step 3: Apply Heat to Loosen the Adhesive
Use a heat gun or hairdryer on low heat to apply warmth to the edges of the screen for about 1-2 minutes. This softens the adhesive that holds the screen in place, making it easier to remove without causing damage.
Step 4: Use the Suction Cup to Lift the Screen
Place the suction cup tool near the edge of the display. Gently pull up on the suction cup to create a small gap between the screen and the frame. Be careful not to apply too much force to avoid damaging the screen.
Step 5: Pry Open the Screen
Once you’ve created a gap, use a plastic pry tool or spudger to carefully work around the edges of the screen. Be patient and go slowly, making sure you don’t damage any internal components.
Step 6: Disconnect the Cables
With the screen loosened, carefully lift it away from the device. Inside, you’ll find several cables connecting the screen to the phone’s motherboard. Use your plastic spudger or tweezers to gently disconnect these cables.
Step 7: Install the New LCD Screen Assembly
Once the old screen is removed, take your new 6.7″ AMOLED LCD screen assembly and carefully connect the display cables to the motherboard. Make sure the connectors are securely attached.
Step 8: Reassemble the Phone
After the new screen is securely connected, carefully press the screen back into place. If necessary, apply light pressure to ensure the adhesive sticks properly. Once the screen is attached, reassemble the rest of the phone, including the back cover and battery.
Step 9: Power On the Device
Finally, power on your Samsung Z Flip and test the new display to ensure everything is working properly. Check the touchscreen functionality, screen brightness, and color accuracy.
Conclusion
Replacing the 6.7″ AMOLED LCD for your Samsung Z Flip 1 4G (SM-F700) or Z Flip 2 5G (F707B) can be a rewarding DIY project if you have the right tools and a steady hand. By following the steps outlined above, you can restore your foldable phone to its former glory and enjoy its stunning display once again. However, if you feel uncomfortable performing the repair yourself, it’s always a good idea to consult a professional technician to ensure the job is done right.
Remember, screen repairs can be tricky, so take your time, and always use the proper tools to avoid damaging your device further. Happy fixing!