How to Replace the Charging Board of Your Samsung Galaxy Note 8: A Step-by-Step Guide
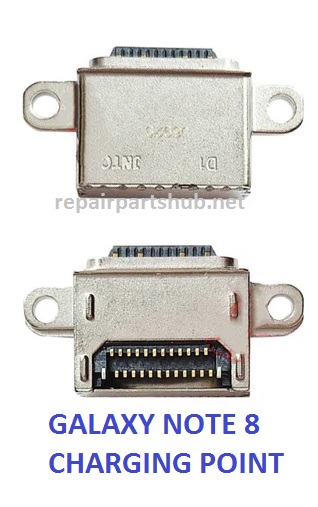
If you’re facing issues with your Samsung Galaxy Note 8 charging, such as the device not charging, charging slowly, or not detecting the charging cable at all, the culprit could be a faulty charging board. The charging board (also known as the charging port) is crucial for transferring power to the device and handling data transfer through the USB connection. Replacing this part isn’t as difficult as it may seem, but it requires the right tools and some patience. In this blog post, we’ll walk you through the process of replacing your Samsung Galaxy Note 8’s charging board and the tools you’ll need for the job.
Why Replace the Charging Board?
Before we dive into the replacement process, let’s quickly go over why you might need to replace the charging board in the first place. The charging board could become damaged due to:
- Physical damage: If your phone has been dropped or exposed to moisture, it can cause the charging board to malfunction.
- Wear and tear: Frequent plugging and unplugging of the charging cable can eventually wear down the port’s connectors.
- Charging issues: If your phone doesn’t recognize charging cables, charges slowly, or doesn’t charge at all, a faulty charging board might be to blame.
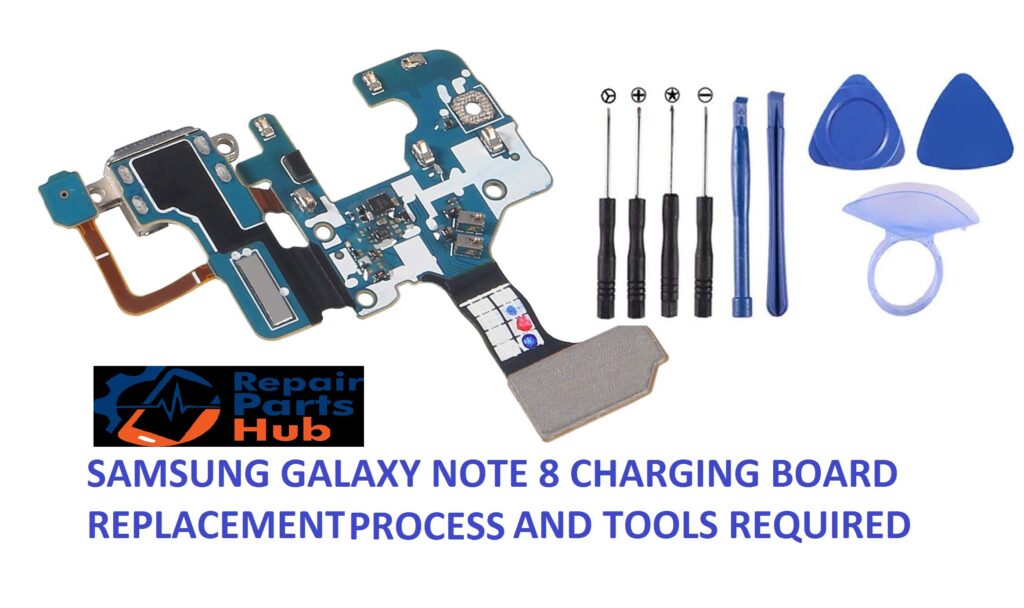
What You’ll Need for the Replacement
Before you start the replacement, make sure you have all the necessary tools and replacement parts on hand:
Tools:
- Screwdriver Set (Precision Set): For opening the device and unscrewing screws.
- Pentalobe screwdriver (for screws around the back case).
- Phillips screwdriver (for screws inside the phone).
- Plastic Pry Tools: To open up the phone without damaging the casing or the internals.
- SIM Card Ejector Tool: To remove the SIM card tray before opening the phone.
- Tweezers: For handling small screws and components.
- Suction Cup Tool: To lift the glass back panel off the phone.
- Heat Gun or Hair Dryer: To soften adhesive holding the back cover in place (optional).
- Replacement Charging Board: Ensure you have a high-quality replacement part compatible with the Samsung Galaxy Note 8.
- Antistatic Wrist Strap: To prevent static electricity from damaging sensitive components.
Step-by-Step Guide to Replacing the Charging Board
Step 1: Power Down Your Device
Start by powering off your Samsung Galaxy Note 8 completely. This is important for safety and to avoid causing any electrical shorts while working inside your phone.
Step 2: Remove the SIM Card Tray
Using the SIM card ejector tool, remove the SIM card tray from the side of your phone. This is necessary to access the screws that hold the phone together.
Step 3: Heat the Back Cover
The back cover of the Samsung Galaxy Note 8 is glued on, so you may need a heat gun or hair dryer to soften the adhesive. Apply heat for about 1-2 minutes to make the adhesive more pliable.
Step 4: Pry Open the Back Panel
Once the adhesive has softened, use a plastic pry tool or suction cup to carefully lift the back panel. Start from the edge and work your way around the phone to detach the cover. Be careful not to crack or break the glass.
Step 5: Unscrew the Internal Components
After removing the back panel, you’ll need to remove several screws securing internal components like the battery and motherboard. Use your precision screwdriver set for this.
Step 6: Disconnect the Battery
Before proceeding, it’s a good idea to disconnect the battery to avoid electrical issues. Carefully unplug the battery connector from the motherboard using your tweezers or a plastic tool.
Step 7: Remove the Old Charging Board
Once you’ve disconnected the battery, look for the charging board located at the bottom of the phone. There may be screws securing it in place. Use your screwdriver to remove those screws and carefully lift the charging board from its housing.
Step 8: Install the New Charging Board
Take the new charging board and place it into the same spot where the old one was located. Make sure the connectors align properly and then secure it with screws.
Step 9: Reassemble the Phone
Once the new charging board is securely installed, it’s time to put the phone back together. Reconnect the battery, screw everything back into place, and reattach the back panel. Make sure the adhesive is strong enough to hold the cover in place, or use additional adhesive strips if necessary.
Step 10: Test the New Charging Board
Before closing everything up, power on your phone and test the charging port to make sure everything works correctly. Plug in your charger and see if the device detects the cable and starts charging.
Step 11: Final Assembly
Once you’ve confirmed that the charging board is working, reassemble the remaining parts of the phone. Replace the SIM card tray, and ensure all screws are tightened and components are securely in place.
Conclusion
Replacing the charging board of your Samsung Galaxy Note 8 can be a great DIY project if you’re comfortable with taking apart your phone. However, if you’re unsure or don’t have the proper tools, it’s always best to seek professional help to avoid any mistakes. With the right tools, patience, and care, you can bring your device back to life without the need for a costly repair service.
By following this guide, you should have no trouble replacing your charging board and restoring your device to working order. If you need any help along the way, don’t hesitate to consult a professional or refer back to this guide!
Happy fixing!