How to Replace the Charging Board on SAMSUNG M52/M526 – A Step-by-Step Guide
Smartphones have become an essential part of our daily lives, making them incredibly useful tools for communication, entertainment, work, and so much more. One of the most crucial components of any smartphone is the charging board, which handles the power input, charging circuitry, and sometimes the data transfer. If you own a SAMSUNG M52 or M526 and have been facing issues with charging or connectivity, it may be time to replace the charging board.
In this detailed guide, we will walk you through the process of replacing the charging board on your Samsung M52/M526. The process involves careful handling and attention to detail, so make sure you follow each step precisely to avoid any damage to your device.
Why Replace the Charging Board?
Before diving into the replacement process, it’s important to understand why you might need to replace the charging board. Some common issues that indicate a malfunctioning charging board include:
- The phone does not charge when plugged into a charger.
- The phone charges very slowly or intermittently.
- The charging port feels loose or unresponsive.
- Overheating while charging.
- The phone cannot detect a connected USB cable.
If you’ve ruled out other potential issues like a faulty charging cable or adapter, and your phone’s charging problems persist, the charging board could be the culprit.
Tools and Equipment You Will Need:

Before you begin, gather the following tools and materials to ensure a smooth and successful replacement process:
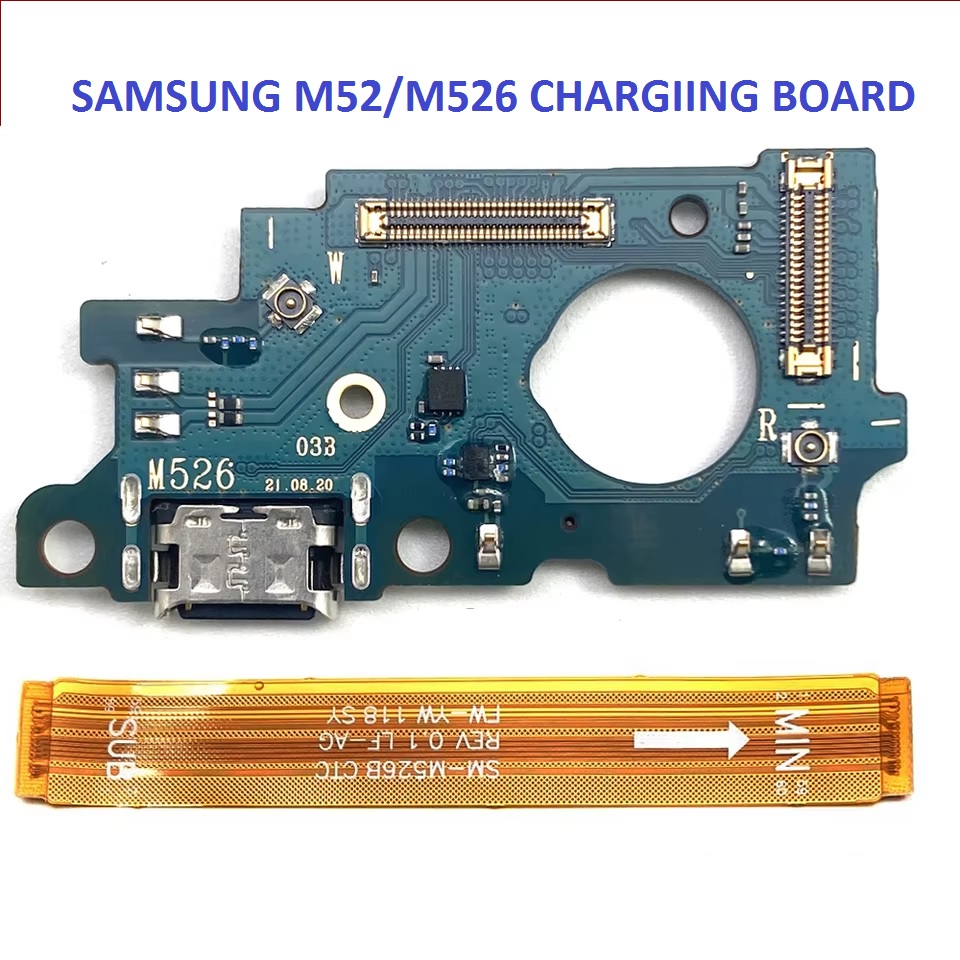
- Replacement Charging Board (Make sure to purchase the correct one for SAMSUNG M52/M526)
- Screwdriver Set (Typically, you’ll need a Pentalobe or Phillips screwdriver)
- Plastic Pry Tools (To prevent damaging the phone’s casing)
- Suction Cup Tool (For safely lifting the screen)
- Tweezers (For precise handling of small components)
- SIM Card Ejector Tool (To remove the SIM tray)
- Anti-static Wrist Strap (To prevent damage to internal components)
- Isopropyl Alcohol (For cleaning purposes)
- Heat Gun or Hairdryer (To loosen adhesive if necessary)
Step 1: Prepare Your Workspace
Ensure you are working in a clean, well-lit environment. You don’t want to risk losing small screws or damaging components in a cluttered space. Use an anti-static mat to place your phone on, and wear an anti-static wrist strap to prevent static electricity from damaging sensitive parts.
Step 2: Power Off the Phone
Before disassembling your phone, ensure it is completely powered off. Press and hold the power button, then tap on the option to power off the device. This reduces the risk of electrical shock or short circuiting.
Step 3: Remove the SIM Card Tray
Using your SIM card ejector tool, carefully remove the SIM card tray from your Samsung M52/M526. This is an important step because the tray could obstruct the disassembly process.
Step 4: Remove Screws and Back Cover
Next, locate and unscrew all visible screws around the back of the phone. For most modern smartphones, the screws will be located around the edge of the device and may be covered by small rubber flaps. Use a precision screwdriver to remove them carefully.
Once the screws are removed, use a suction cup tool to gently lift the back cover. If it is stuck due to adhesive, use a heat gun or hairdryer to warm the adhesive slightly and soften it. Be cautious not to overheat the phone. Insert a plastic pry tool along the edge of the back cover and work your way around until it pops off.
Step 5: Disconnect the Battery
To avoid any electrical hazards during the repair, disconnect the battery. Find the battery connector on the motherboard, and carefully use a plastic tool to lift it away. This step ensures no power flows through the phone while you’re working.
Step 6: Locate the Charging Board
Now that the back cover is removed, you should be able to locate the charging board. In many smartphones, the charging board is positioned at the bottom of the device and is connected to the motherboard by a ribbon cable. Carefully inspect the charging board, as it may be secured with additional screws or held in place by clips.
Step 7: Disconnect the Charging Board
Use a pair of tweezers or a plastic tool to carefully disconnect the ribbon cable from the charging board. Be gentle, as these connectors are delicate. Once the cable is disconnected, remove any screws securing the charging board in place. If adhesive is holding it, use a plastic pry tool to gently loosen the charging board.
Step 8: Remove the Faulty Charging Board
With all screws and connectors removed, carefully lift the faulty charging board out of the phone. Keep an eye on the surrounding components, as they may also be delicate. Place the old charging board aside and make sure that no dust or debris enters the phone.
Step 9: Install the New Charging Board
Now, it’s time to install the replacement charging board. Start by carefully aligning it with the connectors and the screw holes. Gently press it into place, ensuring that the connectors line up perfectly. Secure it with the screws that you previously removed.
Step 10: Reconnect the Battery
Once the new charging board is securely in place, reconnect the battery by carefully aligning the connector and pressing it into position. This ensures that the power will flow to the board when the phone is powered back on.
Step 11: Reassemble the Phone
After the new charging board is installed and the battery is reconnected, it’s time to reassemble the phone. Carefully place the back cover back onto the phone, making sure it aligns properly. Reinstall all screws, securing the back cover tightly.
Step 12: Power On the Device
Once the phone is reassembled, power it on and check if the charging issue has been resolved. Plug in your charging cable and check if the phone starts charging as expected. Also, test any other functions that are connected to the charging board, such as USB data transfer or audio output, to ensure everything works correctly.
Step 13: Final Check and Clean Up
If everything is functioning as it should, your job is complete! If the phone is still not charging, there may be another issue with the motherboard or power IC, and further diagnosis would be needed.
If you haven’t done so already, be sure to clean your phone’s internal components with isopropyl alcohol and a soft cloth to remove any dust, fingerprints, or debris. It’s a good practice to leave the device powered off for a while after a repair before using it extensively.
Conclusion
Replacing the charging board in a SAMSUNG M52/M526 can be a bit tricky, but with the right tools, a steady hand, and a good understanding of the process, it’s a task you can accomplish yourself. This repair can save you a lot of money compared to taking your phone to a repair shop.
Remember, take your time with each step, and be cautious when handling internal components. If at any point you feel unsure about the process, it’s always a good idea to consult with a professional repair technician.