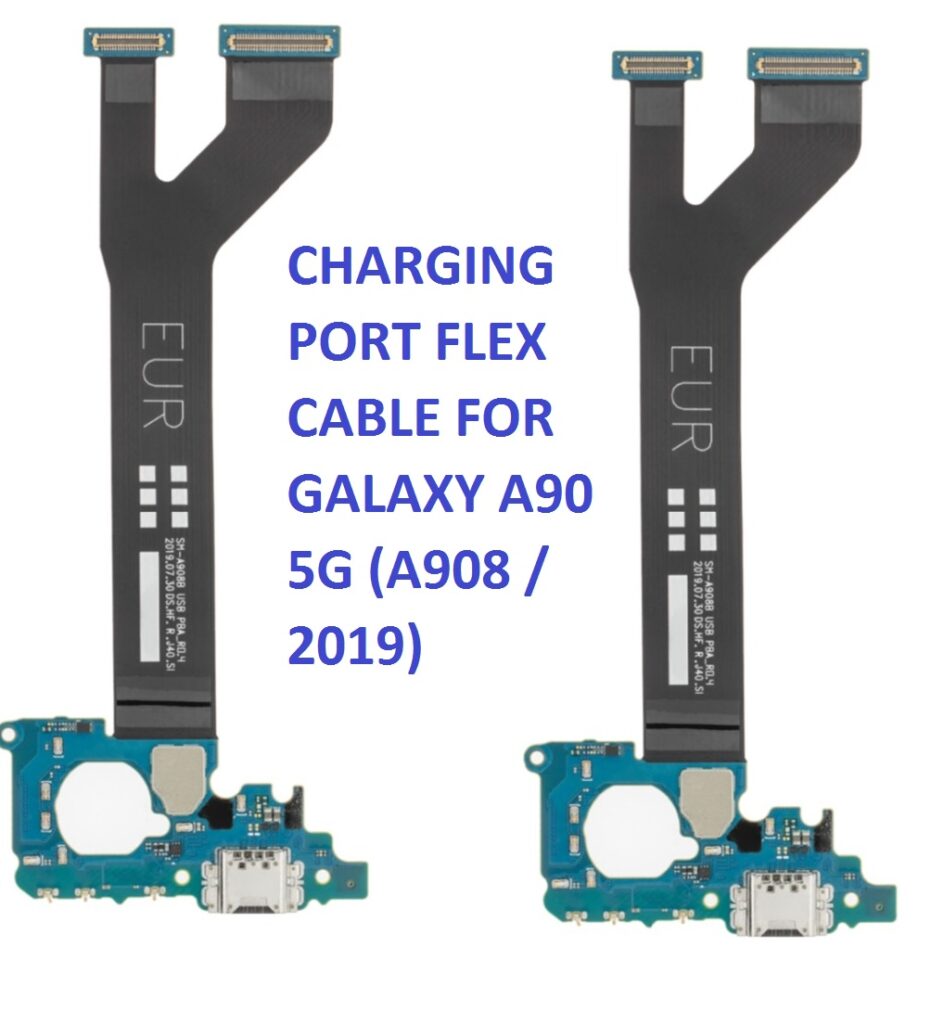
Replacing the charging port flex cable for a Samsung Galaxy A90 5G (A908 / 2019) involves a series of careful steps. Below is a general guide to help you perform the replacement. Please note that this process requires precision, appropriate tools, and careful handling to avoid damaging the device.
Tools Needed:
- Small screwdriver set (Phillips and Torx)
- Pry tools (plastic spudger or opening picks)
- Suction cup tool
- Tweezers
- SIM card ejector
- Replacement charging port flex cable
- Antistatic wrist strap (optional, but recommended)
Step-by-Step Process:
1. Power Off the Device:
- Turn off the Galaxy A90 5G completely to avoid electrical shorts or damage during the repair.
2. Remove the SIM Card Tray:
- Use a SIM card ejector tool to remove the SIM card tray from the device.
3. Heat the Back Glass (Optional):
- If your Galaxy A90 has a glass back, it’s recommended to apply slight heat (using a heat gun or hairdryer) to soften the adhesive for easier removal. Be cautious with the heat to avoid damaging the device.
4. Pry Open the Back Cover:
- Use a plastic pry tool or suction cup to gently lift the back glass cover. If it is too difficult, you can heat it up slightly more, but do not overheat.
- Work your way around the edge of the phone to loosen the adhesive and remove the back cover.
5. Remove Internal Screws:
- Use a small screwdriver (typically Phillips) to remove all screws securing the internal components, including the motherboard and the charging port area.
6. Disconnect the Battery:
- Use a plastic pry tool to disconnect the battery connector from the motherboard. This step is essential to prevent any power from flowing through the device during the repair.
7. Locate the Charging Port Flex Cable:
- The charging port flex cable is usually near the bottom of the phone, connected to the motherboard. It may be connected with screws or adhesive.
8. Remove the Old Charging Port Flex Cable:
- Gently detach any screws or connectors holding the old charging port flex cable in place. Use a plastic pry tool to carefully detach it from the device. Be careful with the connectors to avoid damaging them.
- If the flex cable is stuck, gently work around it with the pry tool to loosen it without damaging the motherboard or surrounding components.
9. Install the New Charging Port Flex Cable:
- Place the new flex cable in the same orientation as the old one.
- Carefully connect the new flex cable to the motherboard, ensuring the connectors align properly and are securely in place.
10. Reassemble the Phone:
- Once the new charging port flex cable is in place, reattach the screws and connectors.
- Reconnect the battery to the motherboard.
11. Reattach the Back Cover:
- Clean any adhesive residue from the back cover and the body of the phone.
- Carefully reattach the back cover, ensuring it is aligned properly. Apply some heat if needed to ensure the adhesive bonds well.
12. Test the Charging Port:
- Power on the phone and test the charging port by plugging in a charging cable to ensure the new flex cable works properly.
13. Final Check:
- Ensure that the phone is charging correctly, and all other functions (like data transfer through the charging port) work as expected.
Important Tips:
- Always use a plastic pry tool instead of metal tools to avoid damaging internal components.
- Handle the flex cable gently, as it is delicate and can tear easily.
- Keep track of all screws and parts to ensure everything goes back together properly.
- Consider using a magnifying glass or light to get a better view of the tiny connectors.
This process should take around 30 to 60 minutes, depending on your experience level. If you’re not confident with repairing the phone, consider seeking professional repair assistance to avoid accidental damage.