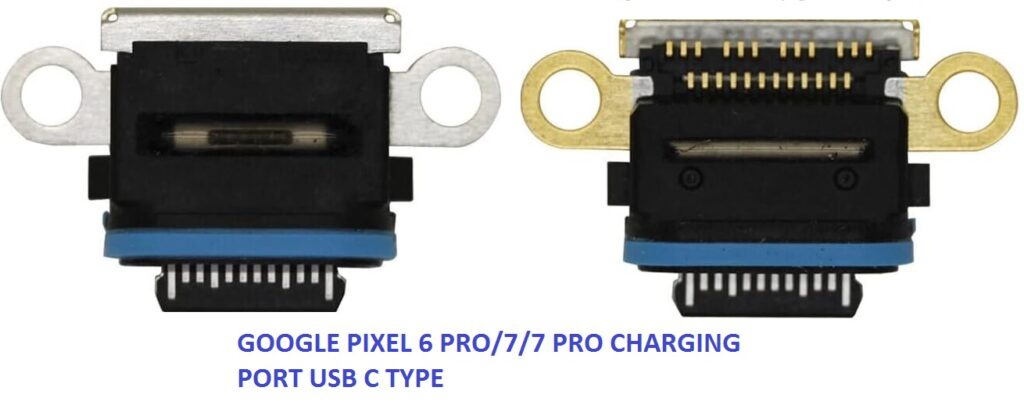
Replacing the USB-C charging port (also referred to as the USB port or dock connector) on a Google Pixel 6 Pro, Pixel 7, or Pixel 7 Pro involves a few technical steps. If you’re planning to do this yourself, be aware that it requires precision, and improper handling could cause further damage to the phone. Here’s an overview of the general replacement process:
Tools Needed:
- Small Phillips head screwdriver
- Pry tools (plastic tools like a spudger or opening picks)
- SIM card ejector tool
- Suction cup (for screen removal)
- Replacement USB-C charging port module
- Isopropyl alcohol (for cleaning)
- ESD-safe wrist strap (optional but recommended to prevent static damage)
Steps to Replace the Charging Port:
- Power Off the Device:
- Turn off your Google Pixel 6 Pro/7/7 Pro to ensure no power runs through the phone during the repair.
- Remove the SIM Tray:
- Use the SIM card ejector tool to remove the SIM tray from the side of your device. This will give you access to the screws inside and prevent damaging the tray.
- Remove the Back Cover:
- Use a suction cup tool or pry tool to separate the back cover of your device. You may need to gently heat the device with a heat gun or hair dryer to soften any adhesive that holds the back cover in place.
- Once the cover begins to lift, use a plastic pry tool to separate the cover completely from the frame.
- Disconnect the Battery:
- Before proceeding further, disconnect the battery to avoid short circuits while working on the device.
- Remove Internal Components to Access the Charging Port:
- Using a small Phillips screwdriver, remove screws securing any internal shielding or brackets around the charging port area.
- Disconnect any connectors or cables that may obstruct the charging port (such as ribbon cables, antennas, or other components).
- Remove the Charging Port Assembly
- The charging port is often attached to the motherboard or a separate dock. Use your pry tools to carefully detach the USB-C port connector from the motherboard.
- You may need to remove additional screws that hold the USB-C port dock in place.
- Install the New USB-C Charging Port:
- Place the replacement charging port assembly in the same orientation as the old one. Be sure the connectors are aligned and properly seated.
- Reattach any screws or components that were removed to secure the charging port in place.
- Reassemble the Device:
- Reconnect any cables that were detached during the disassembly process.Reconnect the battery.
- Reinstall any internal shields or brackets that were removed.
- Test the Charging Port:
- Before sealing the phone, test the new USB-C port by plugging in a charger to ensure the device recognizes it and charges correctly.
- If everything works as expected, you can proceed with reassembling the phone.
- Reattach the Back Cover:
- Once you’re sure the port is functioning correctly, place the back cover back on the device. You may need to apply adhesive or use the original adhesive if it’s still intact.
- Reinsert the SIM Tray:
- Don’t forget to put the SIM tray back into place.
- Power On the Device:
- Power on the phone and check for functionality. Test the charging port again, as well as other features like data transfer via USB.
Additional Tips:
- Heat Carefully: If you’re having trouble removing the back cover, consider using a heat gun or hair dryer. Keep the heat level moderate (around 40-50°C/104-122°F) to avoid damaging the phone.
- Cleanliness: Be sure to clean any connectors or the internal area with isopropyl alcohol to ensure there’s no dust or debris before reassembling.
- ESD Precautions: Static discharge can damage phone components. Wear an ESD wrist strap if possible to avoid damaging sensitive parts.
If you’re not comfortable performing this repair yourself, or if you lack the necessary tools, it’s advisable to seek help from a professional repair technician or a Google-authorized service center.